OpenUSD (Universal Scene Description) — build it locally, run usdview on its own, then embed the viewer in PySide6 with uv, StageView, and simple Qt wiring. Notes for anyone new to USD or stuck on the build.
What you’ll learn
- Building OpenUSD with uv
- Running usdview (uv CLI and a small Python launcher)
- Embedding a USD viewer in PySide6 with StageView
- Driving camera reset, render mode, HUD, BBox, etc. from a Qt .ui file
Prerequisites
- Python 3.11 and uv
- On macOS: Xcode / build tools as required by OpenUSD
Environment
- macOS Sequoia 15.5
- VS Code
- zsh 5.9 (arm64-apple-darwin24.0)
Sample repo
Outline
- What is Universal Scene Description (USD)?
- Build OpenUSD locally (Python / uv)
- Run the USD viewer standalone
- Embed and customize inside PySide6
What is Universal Scene Description (USD)?
Roughly: USD sits in the middle so complex 3D assets can move between apps without chaos. Paraphrase of the official “What is USD”:
Film and games need to generate, store, and ship huge amounts of 3D scene data. Formats differ per app; interchange is painful.
Universal Scene Description (USD) is open software for efficient, scalable sharing of multi-part 3D scenes — not just models and animation, but assembling virtual sets and shots, non-destructive edits, and preview/editing of geometry, shading, lighting through a single scene graph API. Open source under a license close to Apache 2.0 (TOST).
(Source: What is USD — openusd.org)
Build OpenUSD locally
1. Get the sources
As a submodule:
git submodule add https://github.com/PixarAnimationStudios/OpenUSD OpenUSDOr clone:
git clone https://github.com/PixarAnimationStudios/OpenUSD.git2. Create a uv env and run the build script
Follow the official build docs. Example:
uv init -p 3.11
uv add PyOpenGL PySide6 numpy
uv run OpenUSD/build_scripts/build_usd.py BuildUSD
On success you’ll see something like:
Success! To use USD, please ensure that you have:

  The following in your PYTHONPATH environment variable:
  /Users/Username/path/custom-embed-usdviewer/BuildUSD/lib/python

  The following in your PATH environment variable:
  /Users/Username/path/custom-embed-usdviewer/BuildUSD/bin
3. Environment variables
PYTHONPATH:
cat > .env <<EOL
PYTHONPATH=./BuildUSD/lib/python
EOL
PATH:
export PATH=./BuildUSD/bin:$PATHRun the USD viewer standalone
Launch usdview via uv
uv run --env-file=.env usdview OpenUSD/extras/usd/tutorials/convertingLayerFormats/Sphere.usdaFirst launch can be slow.
Python launcher
Create open_usd_viewer.py:
"""Simple USD viewer using pxr.Usdviewq."""
import sys
import pxr.Usdviewq as Usdviewq

if __name__ == "__main__":
    import signal
    signal.signal(signal.SIGINT, signal.SIG_DFL)
    try:
        usd_path = "assets/Sphere.usda"
        sys.argv.append(usd_path)
        Usdviewq.Launcher().Run()
    except Usdviewq.InvalidUsdviewOption as e:
        print("ERROR: " + str(e), file=sys.stderr)
        sys.exit(1)
Run:
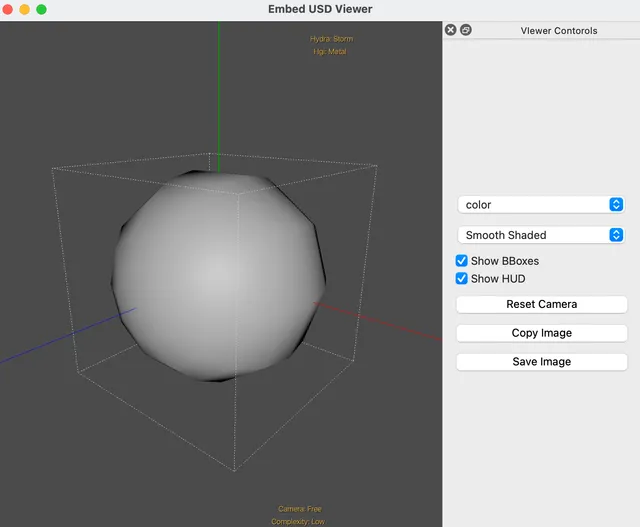
uv run open_usd_viewer.pyEmbed in PySide6
Widget embedding StageView
Use from pxr.Usdviewq.stageView import StageView and expose small wrapper methods so Qt buttons/combos can call into the viewer later.
embed_usd_widget.py (click to expand)
"""Embed a USD viewer in a PySide6 widget."""
import os
import sys
from datetime import datetime
from PySide6 import QtCore, QtWidgets
from pxr import Usd, UsdUtils
from pxr.Usdviewq.stageView import StageView, RenderModes
class EmbedUSDWidget(QtWidgets.QWidget):
"""Widget to embed USD stage viewer."""
def __init__(self, stage=None):
super(EmbedUSDWidget, self).__init__()
self.model = StageView.DefaultDataModel()
self.stage = stage
self.view = StageView(dataModel=self.model)
layout = QtWidgets.QVBoxLayout(self)
layout.addWidget(self.view)
layout.setContentsMargins(0, 0, 0, 0)
if self.stage:
self.set_stage(self.stage)
self.view.updateView(resetCam=True, forceComputeBBox=True)
def image_save(self):
image = self.view.grabFramebuffer()
timestamp = datetime.now().strftime("%Y-%m-%d_%H%M%S")
os.makedirs("screenshots", exist_ok=True)
filename = f"screenshots/screenshot_{timestamp}.png"
image.save(filename)
def set_stage(self, stage):
self.model.stage = stage
def set_render_mode(self, mode):
if mode in RenderModes:
self.model.viewSettings.renderMode = mode
def reset_camera(self):
self.view.updateView(resetCam=True, forceComputeBBox=True)
def show_hud(self, enable=True):
"""Show the HUD (Heads-Up Display)."""
self.model.viewSettings.showHUD = enable
def show_bboxes(self, enable=True):
self.model.viewSettings.showBBoxes = enable
def closeEvent(self, event):
"""Close event handler for cleanup."""
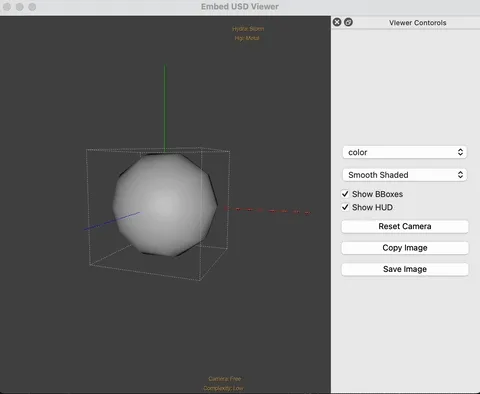
self.view.closeRenderer()Qt Designer UI
Build a .ui in Qt Creator / Designer and place the embed widget in the layout.
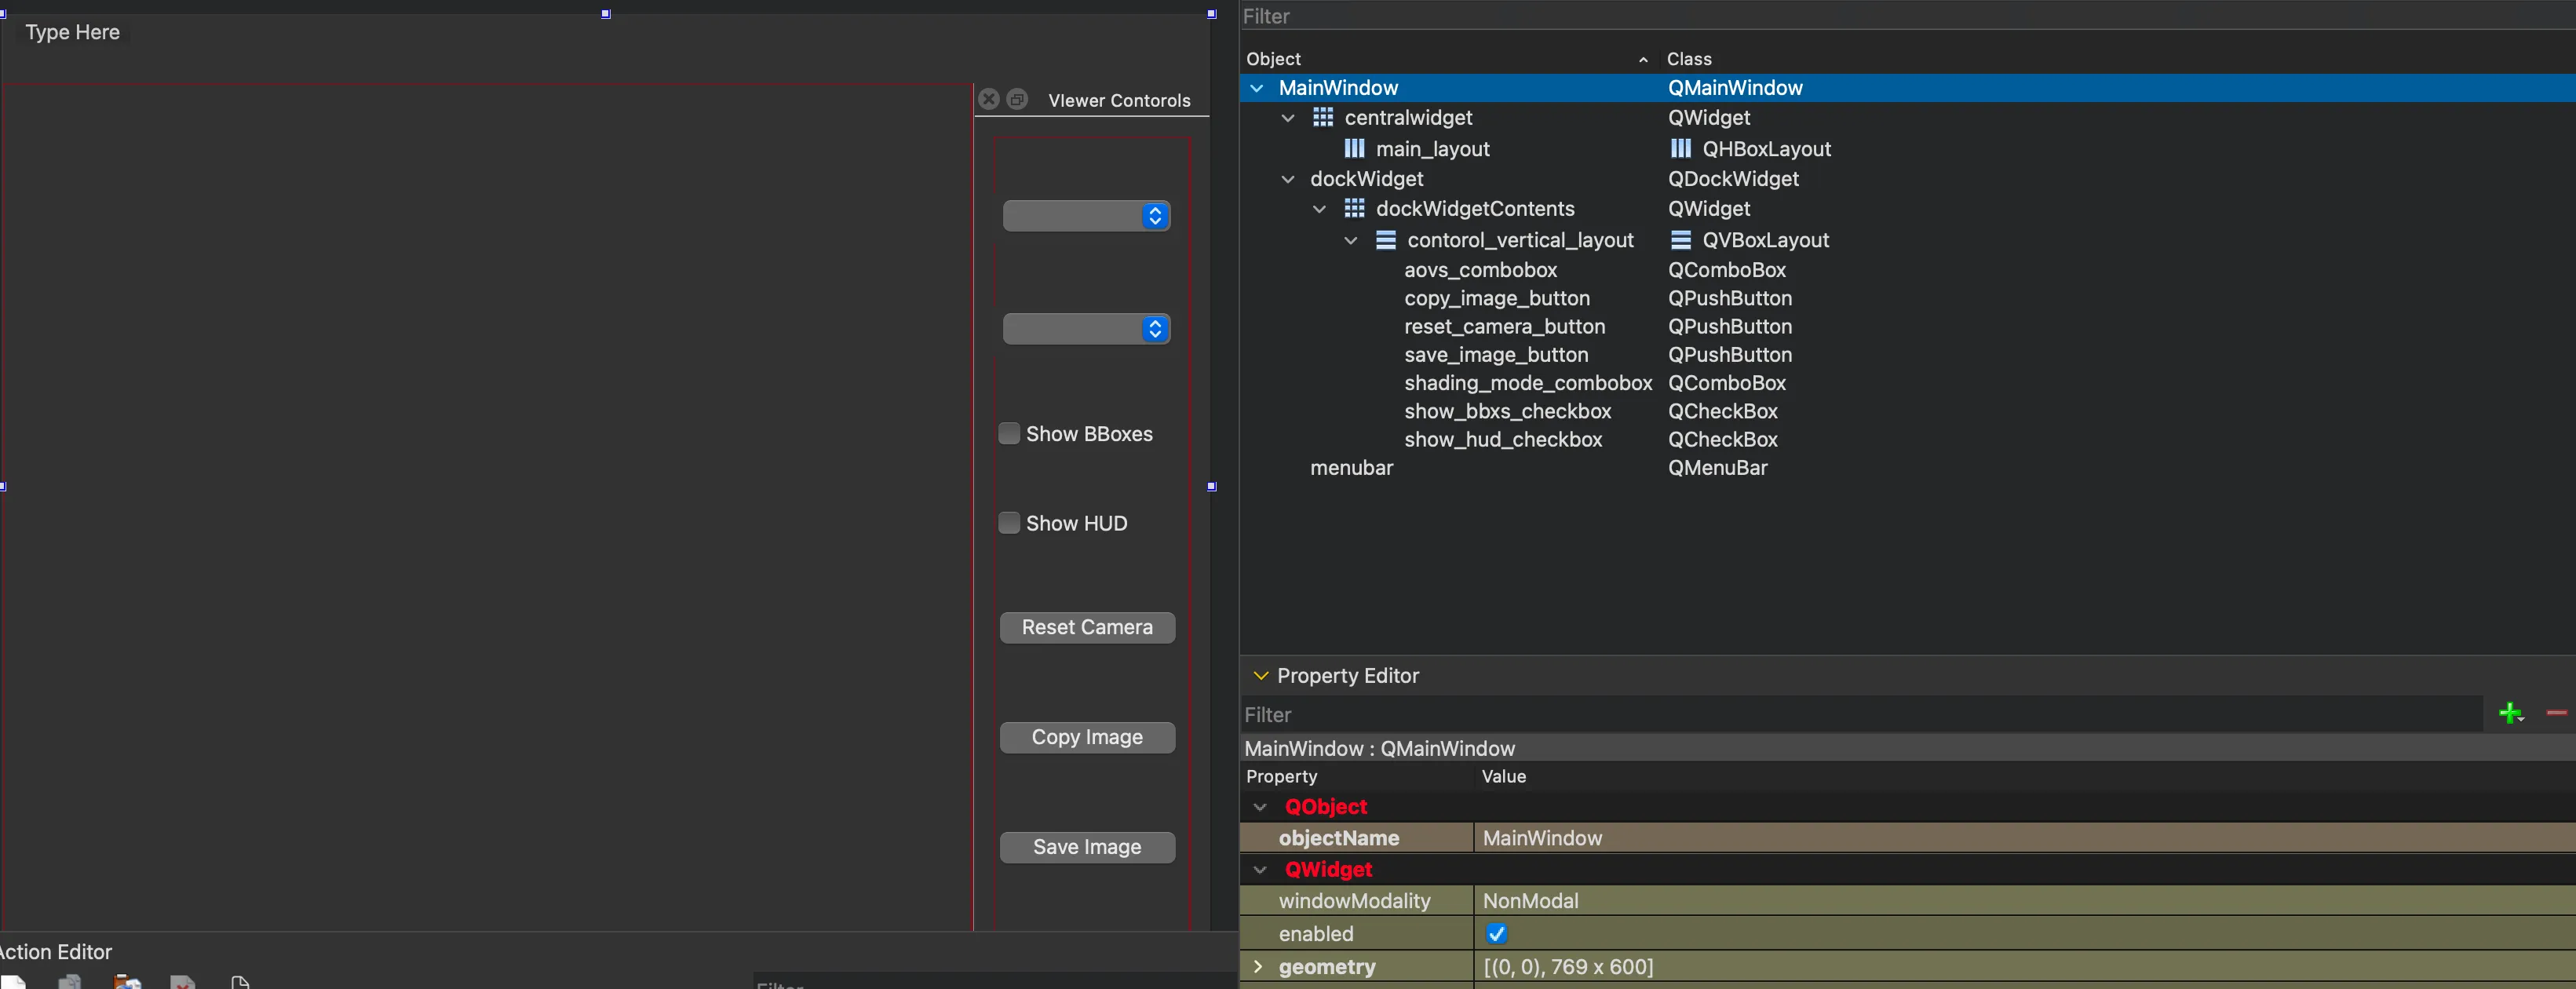
Wire buttons, combo boxes, and checkboxes to reset_camera, set_render_mode, show_hud, show_bboxes, image_save, etc.
- Example .ui: usdViewerController.ui
mkdir -p UI && curl -L -o UI/usdViewerController.ui https://raw.githubusercontent.com/testkun08080/custom-embed-usdviewer/main/UI/usdViewerController.uiIn app.py, load the UI with QUiLoader, add EmbedUSDWidget to the main layout, and connect signals (render mode, HUD, BBox, AOVs, …). See app.py.
Run:
uv run app.py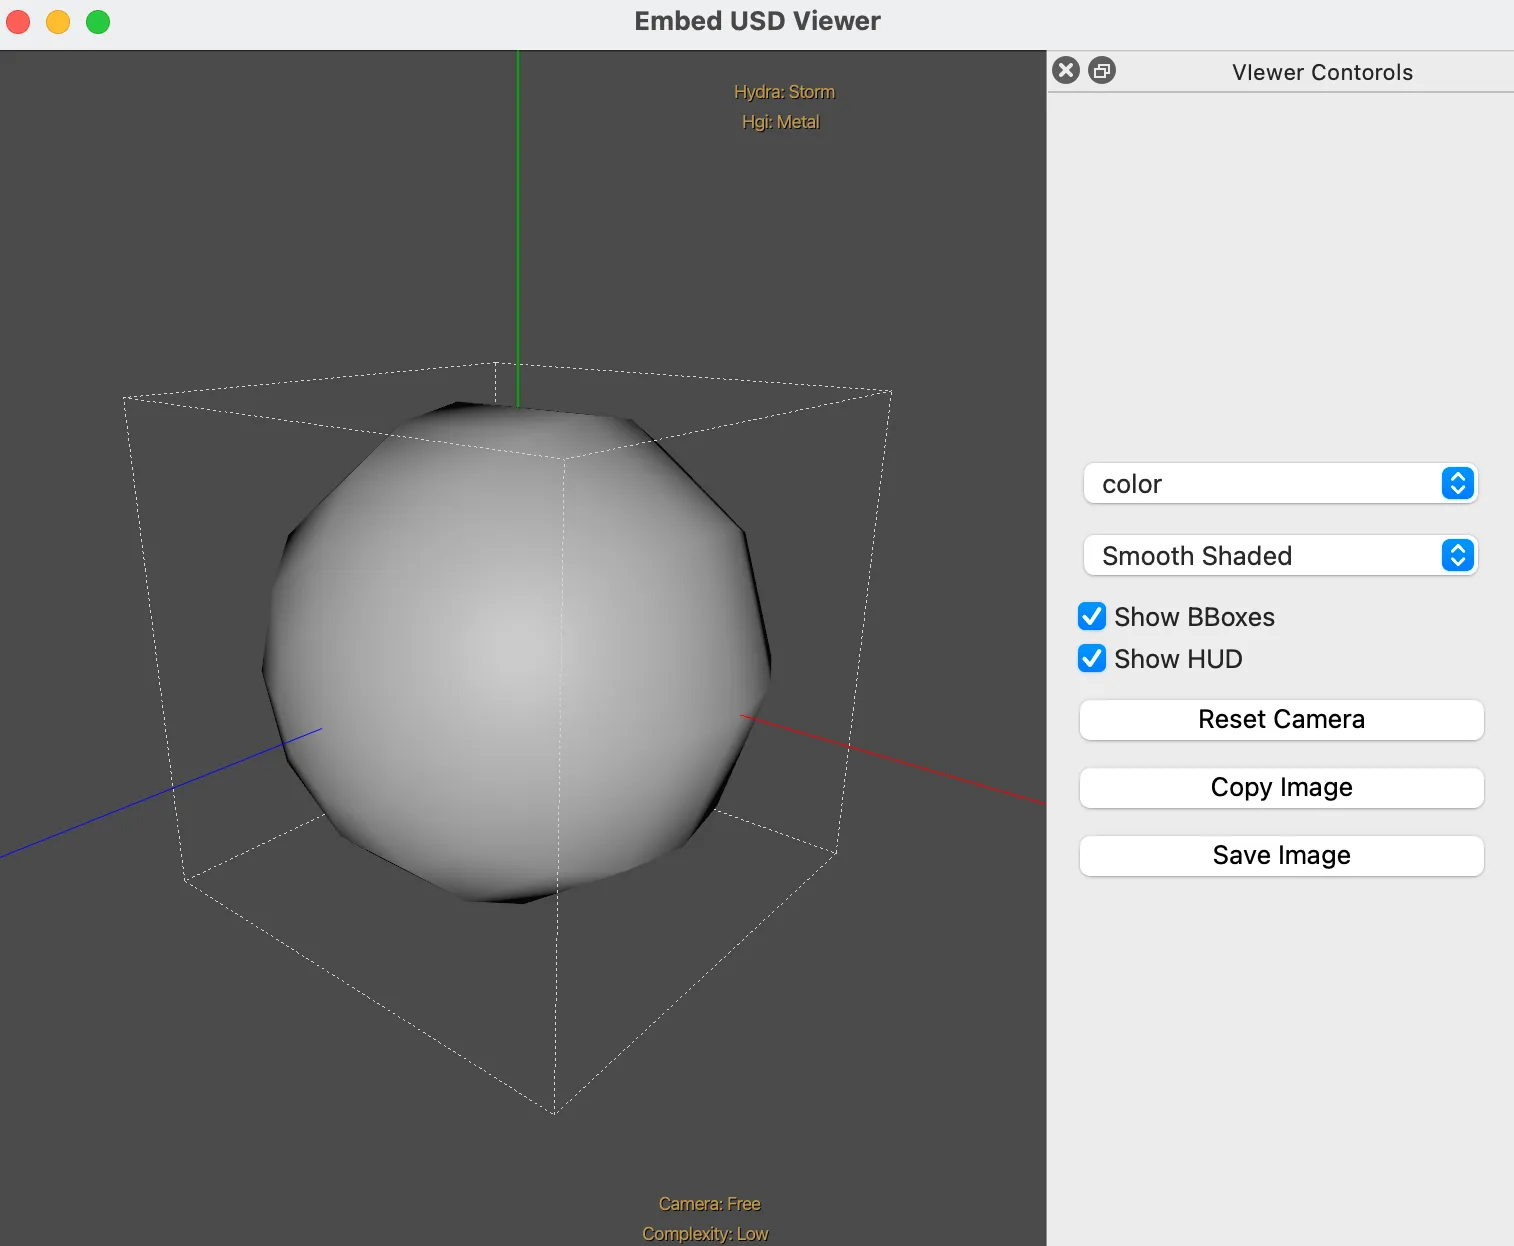
Summary
- Built OpenUSD, ran usdview, then embedded StageView in PySide6.
- With a .ui file you can drive camera reset, render mode, HUD, BBox, screenshots — a good base for internal preview tools.