I wanted to ship a side-project app built with Expo to iOS, so I started with EAS Local: build an IPA on my Mac, then push it to TestFlight.
With eas build --local, you build on your own Xcode instead of sending the job to Expo’s cloud.
I also put together a template repo, template-expo-build-cicd, so I’m writing down the bumps I hit while working through it.
I’d already set up EAS ↔ App Store Connect and certificates on another project, so this round went fairly smoothly.
If this is your first time, the EAS Build docs are worth a skim first.
Sample repository
The steps in this post follow template-expo-build-cicd.
It already has eas.json plus build/submit settings — swap in your Bundle ID and related values.
git clone https://github.com/testkun08080/template-expo-build-cicd.git
cd template-expo-build-cicd
npm ci
What to replace after clone
The template ships with my values, so change these before you build:
| File | Replace |
|---|---|
app.json | ios.bundleIdentifier / extra.eas.projectId |
eas.json | submit.production.ios: appleId / ascAppId / appleTeamId |
For extra.eas.projectId, running eas init and linking to your Expo project is the reliable path.
If you leave the template projectId as-is, eas build will talk to someone else’s project.
Template app.json (excerpt)
{
  "expo": {
    "name": "template-expo-build",
    "slug": "template-expo-build",
    "ios": {
      "bundleIdentifier": "com.testkun08080.template-expo-build",
      "infoPlist": {
        "ITSAppUsesNonExemptEncryption": false
      }
    },
    "extra": {
      "eas": {
        "projectId": "a77f74e1-5302-47a4-a581-eace64b7f025"
      }
    }
  }
}
Match bundleIdentifier to the Bundle ID in App Store Connect.
Replace projectId with your EAS project’s value.
Template eas.json (excerpt)
For Local builds I use production-local (inherits production) or just production.
{
  "cli": {
    "version": ">= 15.0.0",
    "appVersionSource": "remote"
  },
  "build": {
    "base": {
      "node": "20.18.0"
    },
    "production": {
      "extends": "base",
      "channel": "production",
      "autoIncrement": true,
      "ios": {
        "resourceClass": "m-medium"
      }
    },
    "production-local": {
      "extends": "production"
    }
  },
  "submit": {
    "production": {
      "ios": {
        "appleId": "REPLACE_WITH_APPLE_ID",
        "ascAppId": "REPLACE_WITH_ASC_APP_ID",
        "appleTeamId": "REPLACE_WITH_APPLE_TEAM_ID"
      }
    }
  }
}appleId— Apple ID (email)ascAppId— the numeric Apple ID under App Store Connect App InformationappleTeamId— Apple Developer Team ID
Fill these in ahead of time and eas submit asks fewer questions later.
EAS Cloud vs Local
| EAS Cloud | EAS Local | |
|---|---|---|
| Mac required | No | Yes (Xcode 26.x) |
| Where it builds | Expo servers | Your Mac |
| Best for | Convenience / CI | Debugging native bits |
| Build logs | Dashboard | Directly in the terminal |
I usually ship via Xcode Cloud, but walking through EAS Local once made certificate issues much easier to diagnose later.
Prerequisites
- Enrolled in the Apple Developer Program
- App registered in App Store Connect (Bundle ID is set)
eas.jsonproduction profile configuredeas logindone- Xcode 26.2 installed (for Expo SDK 55)
- Node.js 22.x
Check Xcode:
xcodebuild -versionApp Store Connect and Bundle ID
You need an App Store Connect app before TestFlight.
Use the same Bundle ID as app.json → ios.bundleIdentifier.
You can set up the Bundle ID either way:
- Create it first on the Identifiers page
- Or create it interactively while building
npx eas-cli build --profile production --platform ios --localOption 2 can create certificates and the Bundle ID in the same flow.
When I use the template, deciding the Bundle ID up front and putting it in app.json creates less confusion.
Then create the app in App Store Connect as well.
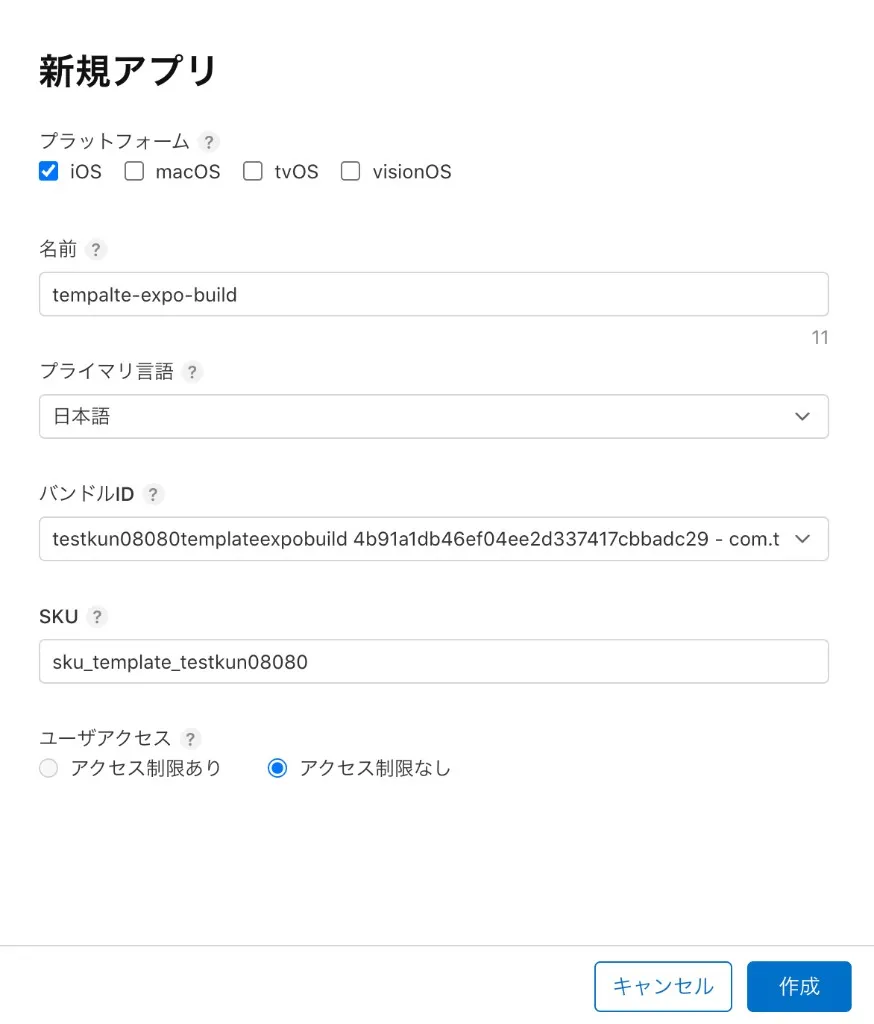
After creation, copy the numeric Apple ID from App Information into eas.json → submit.production.ios.ascAppId.
In the template it’s still a placeholder — rewrite it like this:
{
  "submit": {
    "production": {
      "ios": {
        "appleId": "your-apple-id@example.com",
        "ascAppId": "1234567890",
        "appleTeamId": "ABCD123456"
      }
    }
  }
}
ascAppId is the number in the screenshot below. Putting appleId and appleTeamId in at the same time cuts down submit prompts.
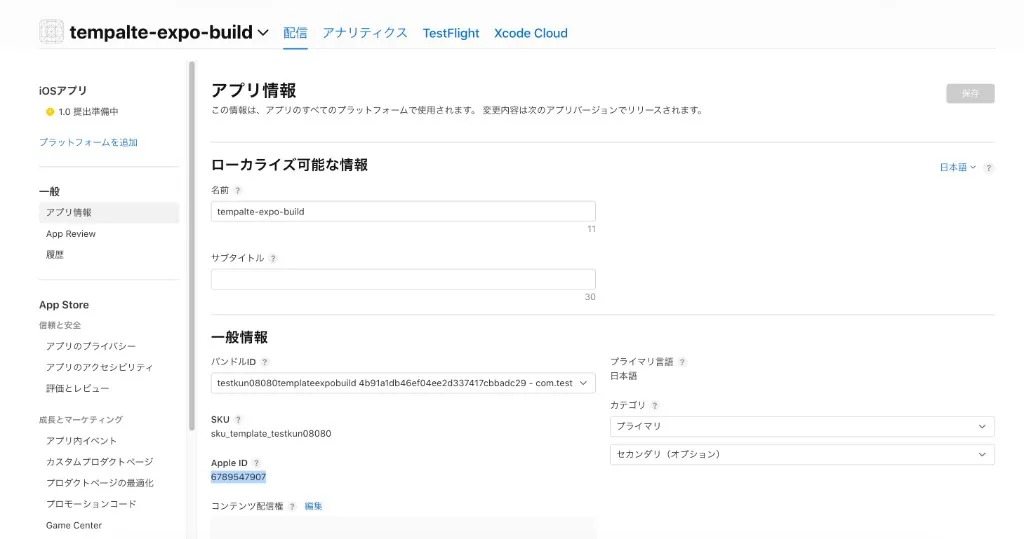
Also confirm the same Bundle ID exists on the Apple Developer side.

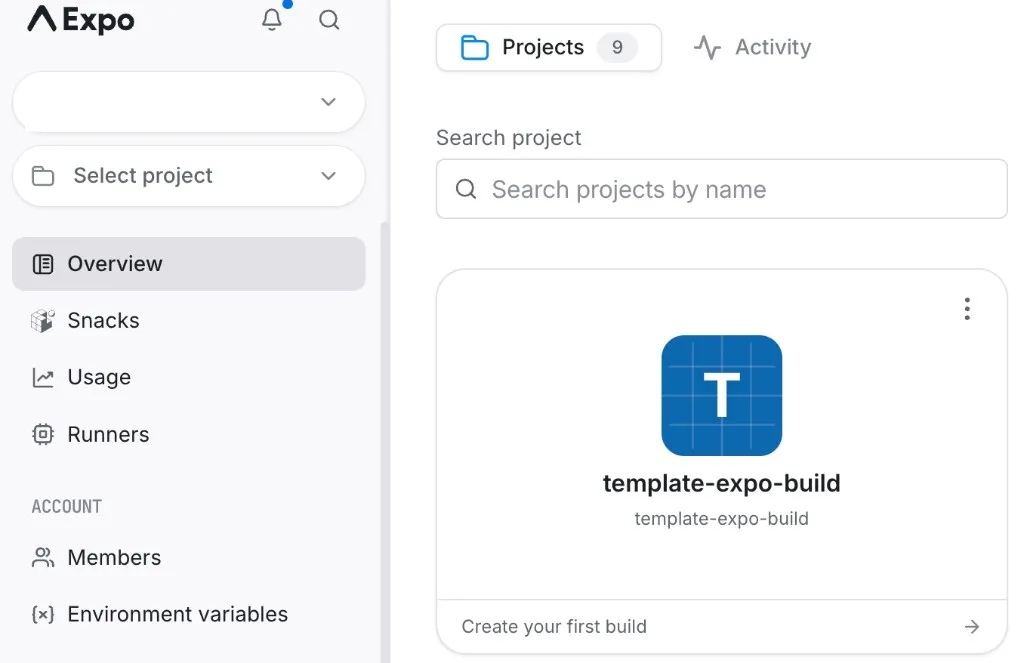
Creating the EAS project
On the first eas build, the EAS project may not be linked yet.
If the CLI asks whether to create one automatically, answer Y and you’ll get a projectId in app.json.

Signing setup
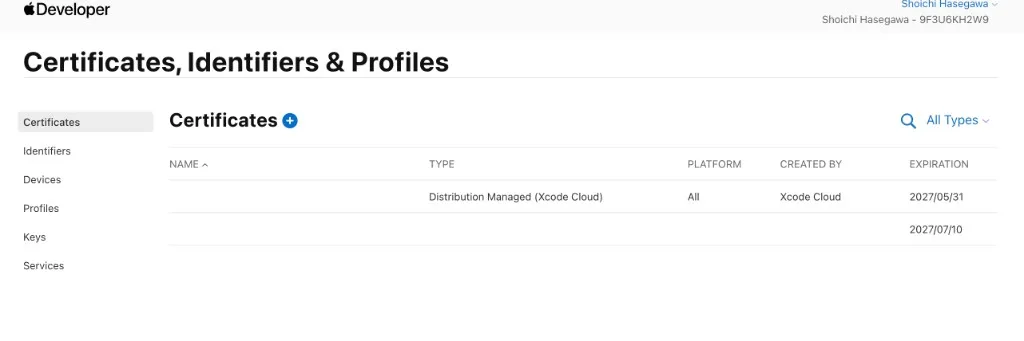
Even for Local builds, registering a Distribution certificate and provisioning profile with eas credentials on the first run was the easiest path for me.
Unlike fastlane match, you don’t need a separate certificates Git repo.
eas credentialsPick iOS → production and it walks you through Apple Developer login and certificate creation.
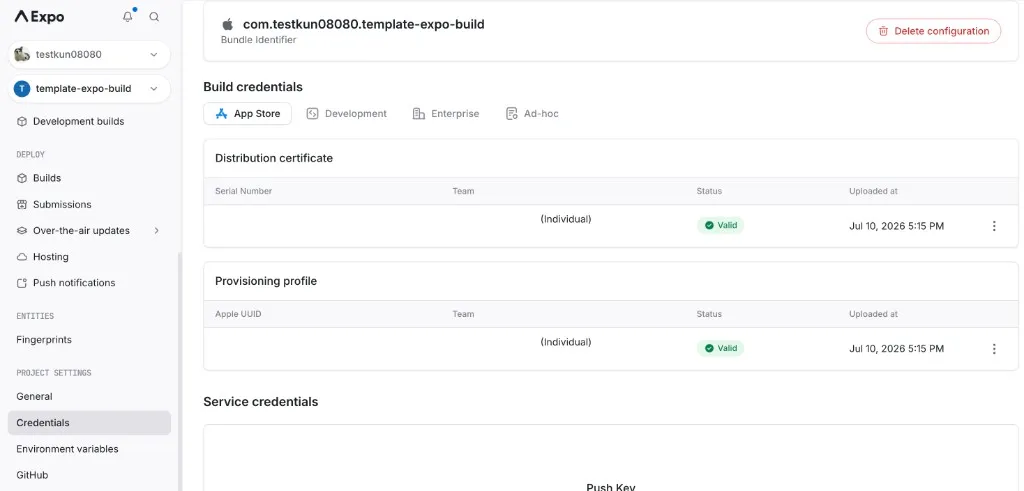
In the EAS dashboard Credentials view, you’re good once the certificate and provisioning profile show Valid.
After the interactive setup finishes, the terminal prints a provisioning-profile-created message.

Running the local build
Install deps, then kick off the local build:
npm ci --legacy-peer-deps
eas build --platform ios --local --profile production \
  --output ./build.ipa
On the first run, leave off --non-interactive so you catch missing setup early (more on that below).
The error I hit
Archive from the .xcworkspace in Xcode succeeded, but EAS Local failed.
The log said the provisioning profile didn’t include the signing certificate:
[RUN_FASTLANE]
❌  Provisioning profile "*[expo] com.testkun08080.template-expo-build AppStore 2026-07-10T07:25:34.991Z" doesn't include signing certificate "Apple Distribution: myname (XXXXXXXX)". (in target 'templateexpobuild' from project 'templateexpobuild')
How I narrowed it down
First I checked whether cloud signing worked:
npx eas-cli build --profile production --platform ios --clear-cacheCloud built fine on my machine, so I figured it was a mismatch between the Mac keychain and the certificate registered with EAS.
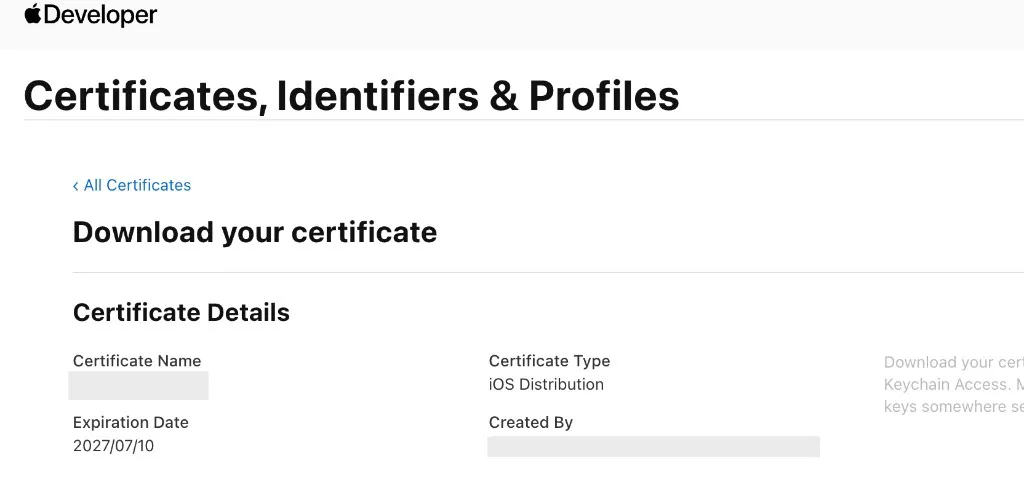
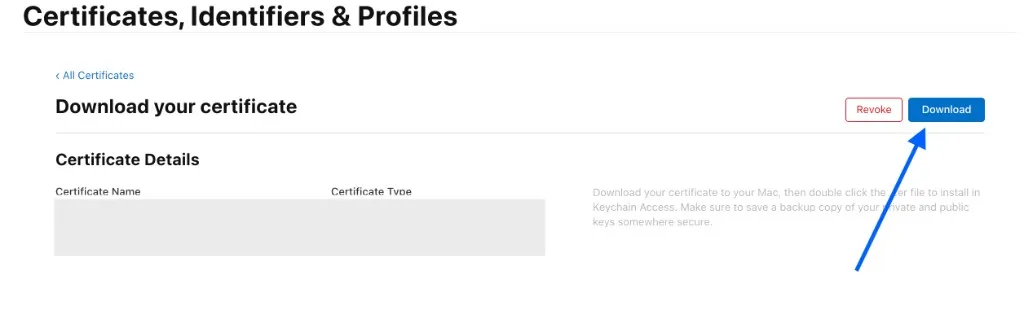
I downloaded the .cer from the Developer portal and compared it with what was on the Mac.
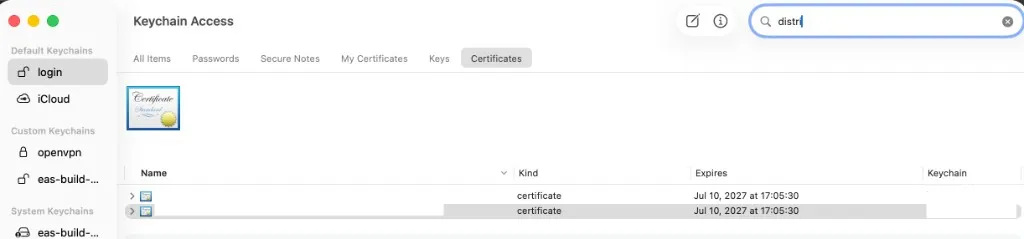
In Keychain Access, search for something like distri to find Distribution certificates.
When Local builds fail, check that the cert shown here matches the one on EAS.
Work through these in order:
security find-identity -v -p codesigning- Find the Distribution cert in Keychain Access (ss10 above)
- Compare it with the Distribution cert shown in EAS Credentials
- Confirm the serial on the
.cerdownloaded from Apple Developer matches
Any mismatch produces the provisioning-profile error above.
Old certs left in the keychain are a common culprit — delete unused ones, or recreate so they match EAS.
Build succeeded
After aligning the certificates, the same Local command succeeded.
You get build.ipa in the current directory.

Submit to TestFlight
eas submit --platform ios --path ./build.ipaIf eas.json has submit.production.ios.ascAppId, the destination resolves automatically.
On the first submit you may get an encryption question — for a typical HTTPS-only app, answer Y.

About --non-interactive
--non-interactive is for CI and scripts.
Add it only after signing and the EAS project are set up once.
eas build --platform ios --local --profile production \
  --output ./build.ipa --non-interactive
Common issues
Provisioning profile / certificate mismatch
This ate the most time for me.
If Xcode Archive works but EAS Local fails, compare Distribution certificate serial numbers across keychain, EAS, and Apple Developer.
Disk space
Local builds expand DerivedData and Pods on your Mac — a few free GB goes a long way.
Wrap-up
eas build --localproduces an IPA on your Mac- Submit with
eas submit --path ./build.ipa— same as Cloud once you have the IPA - For signing issues, match keychain ↔ EAS Credentials
- Great for native debugging, but you need Xcode 26.x and disk space
Next up: building on EAS Cloud.
Compared with Local, it’s basically a couple of commands.
→ Expo EAS Cloud Build — Generate IPA and Submit to TestFlight