I’ve been building workflows on Comfy Cloud and poking around a lot.
Running them one by one in the browser is fine, but when you want the same workflow from a script or an app, you need the API.
This post walks through what I actually tried, based on the Cloud API Overview.
This post includes ComfyUI affiliate / invite links.
What you’ll get from this post
- How to call a Comfy Cloud workflow as an API
- How to download outputs with tools like Postman or Python
Prerequisites & notes
Before you hit the API, keep these in mind.
| Item | Detail |
|---|---|
| Plan | API execution needs a paid plan (Standard / Creator / Pro). The Free tier cannot run workflows via API (docs) |
| API status | Marked Experimental — endpoints and response shapes may change |
| Credits | Uses the same monthly credits as the Web UI (no separate API pool) |
| Base URL | https://cloud.comfy.org |
| Auth | Every request needs an X-API-Key header |
No account yet? You can sign up with the invite link below.
👉 Sign up for Comfy Cloud (invite link)
Overall flow
The official Quick Start is basically four steps:
- Prepare the workflow in API format (build in the browser, then export)
POST /api/promptto submit the job (rewrite inputs if needed)- Wait for completion via polling or WebSocket
- Fetch the output with
/api/view(or the job-details API)
flowchart LR
  A[Build workflow in browser] --> B[Export as API format]
  B --> C["POST /api/prompt"]
  C --> D[Watch progress]
  D --> E["Download via /api/view"]
Step 1. Build a workflow on Comfy Cloud
Start in the browser on Comfy Cloud and pick a template.
I used Z-Image-Turbo (text-to-image) under the Image category.
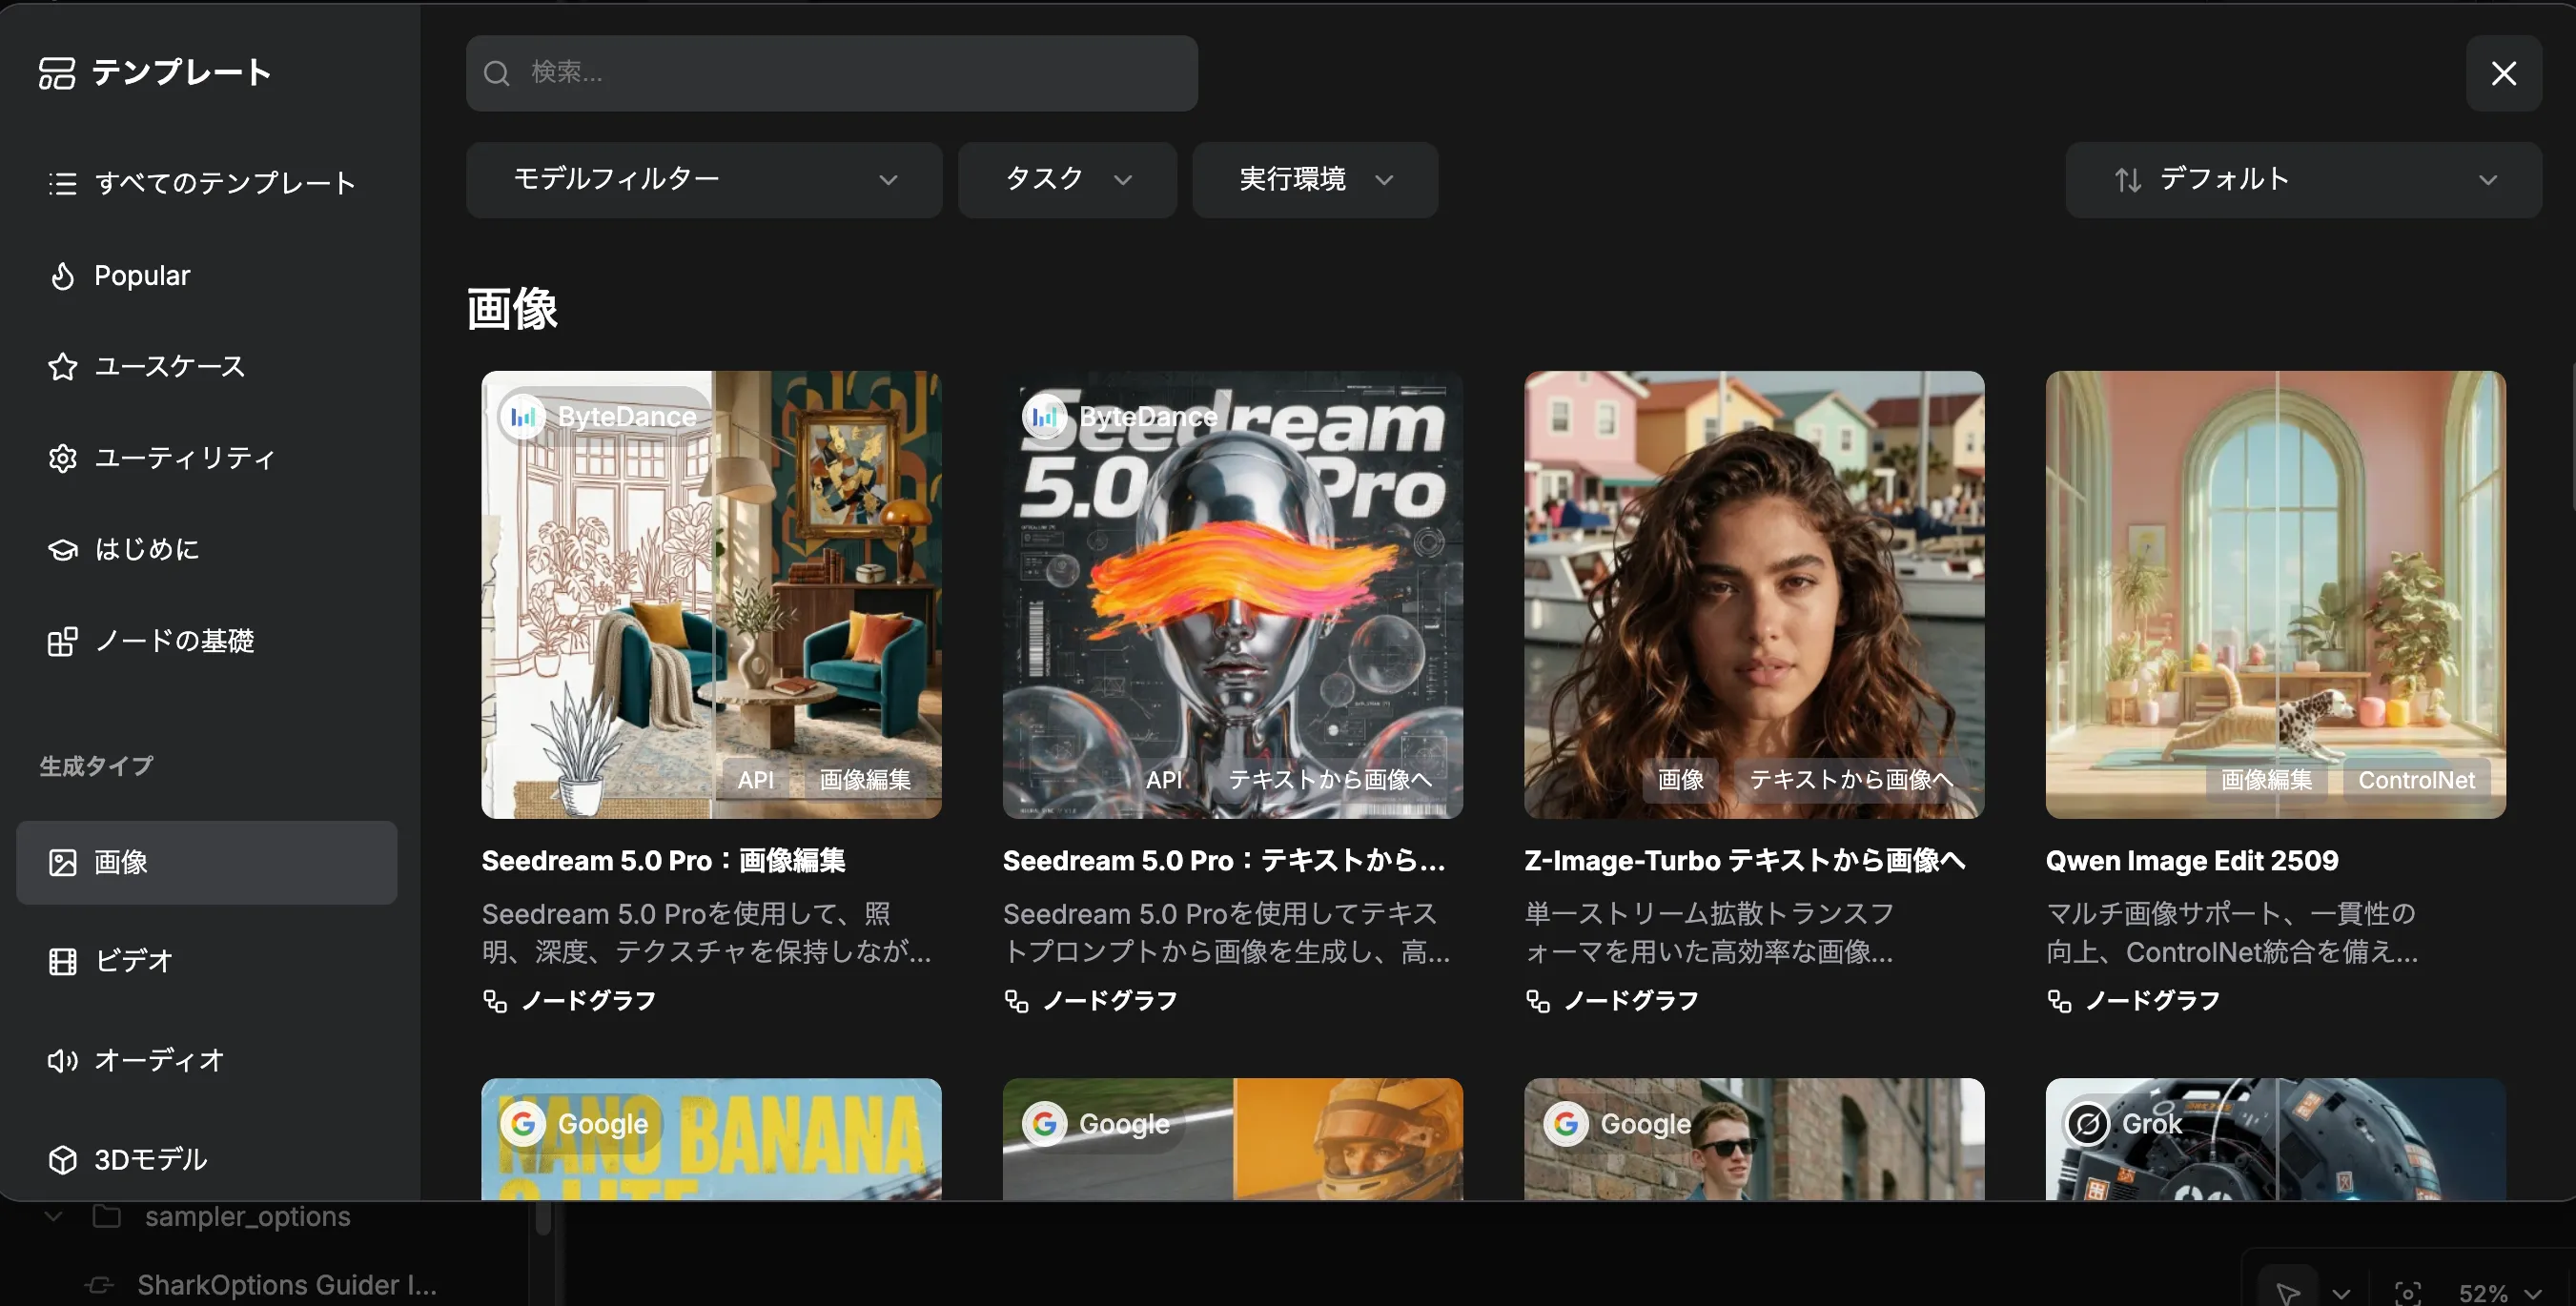
Some templates are partner workflows with an api_ prefix (edits, etc.).
Here’s an example of an API-oriented graph.
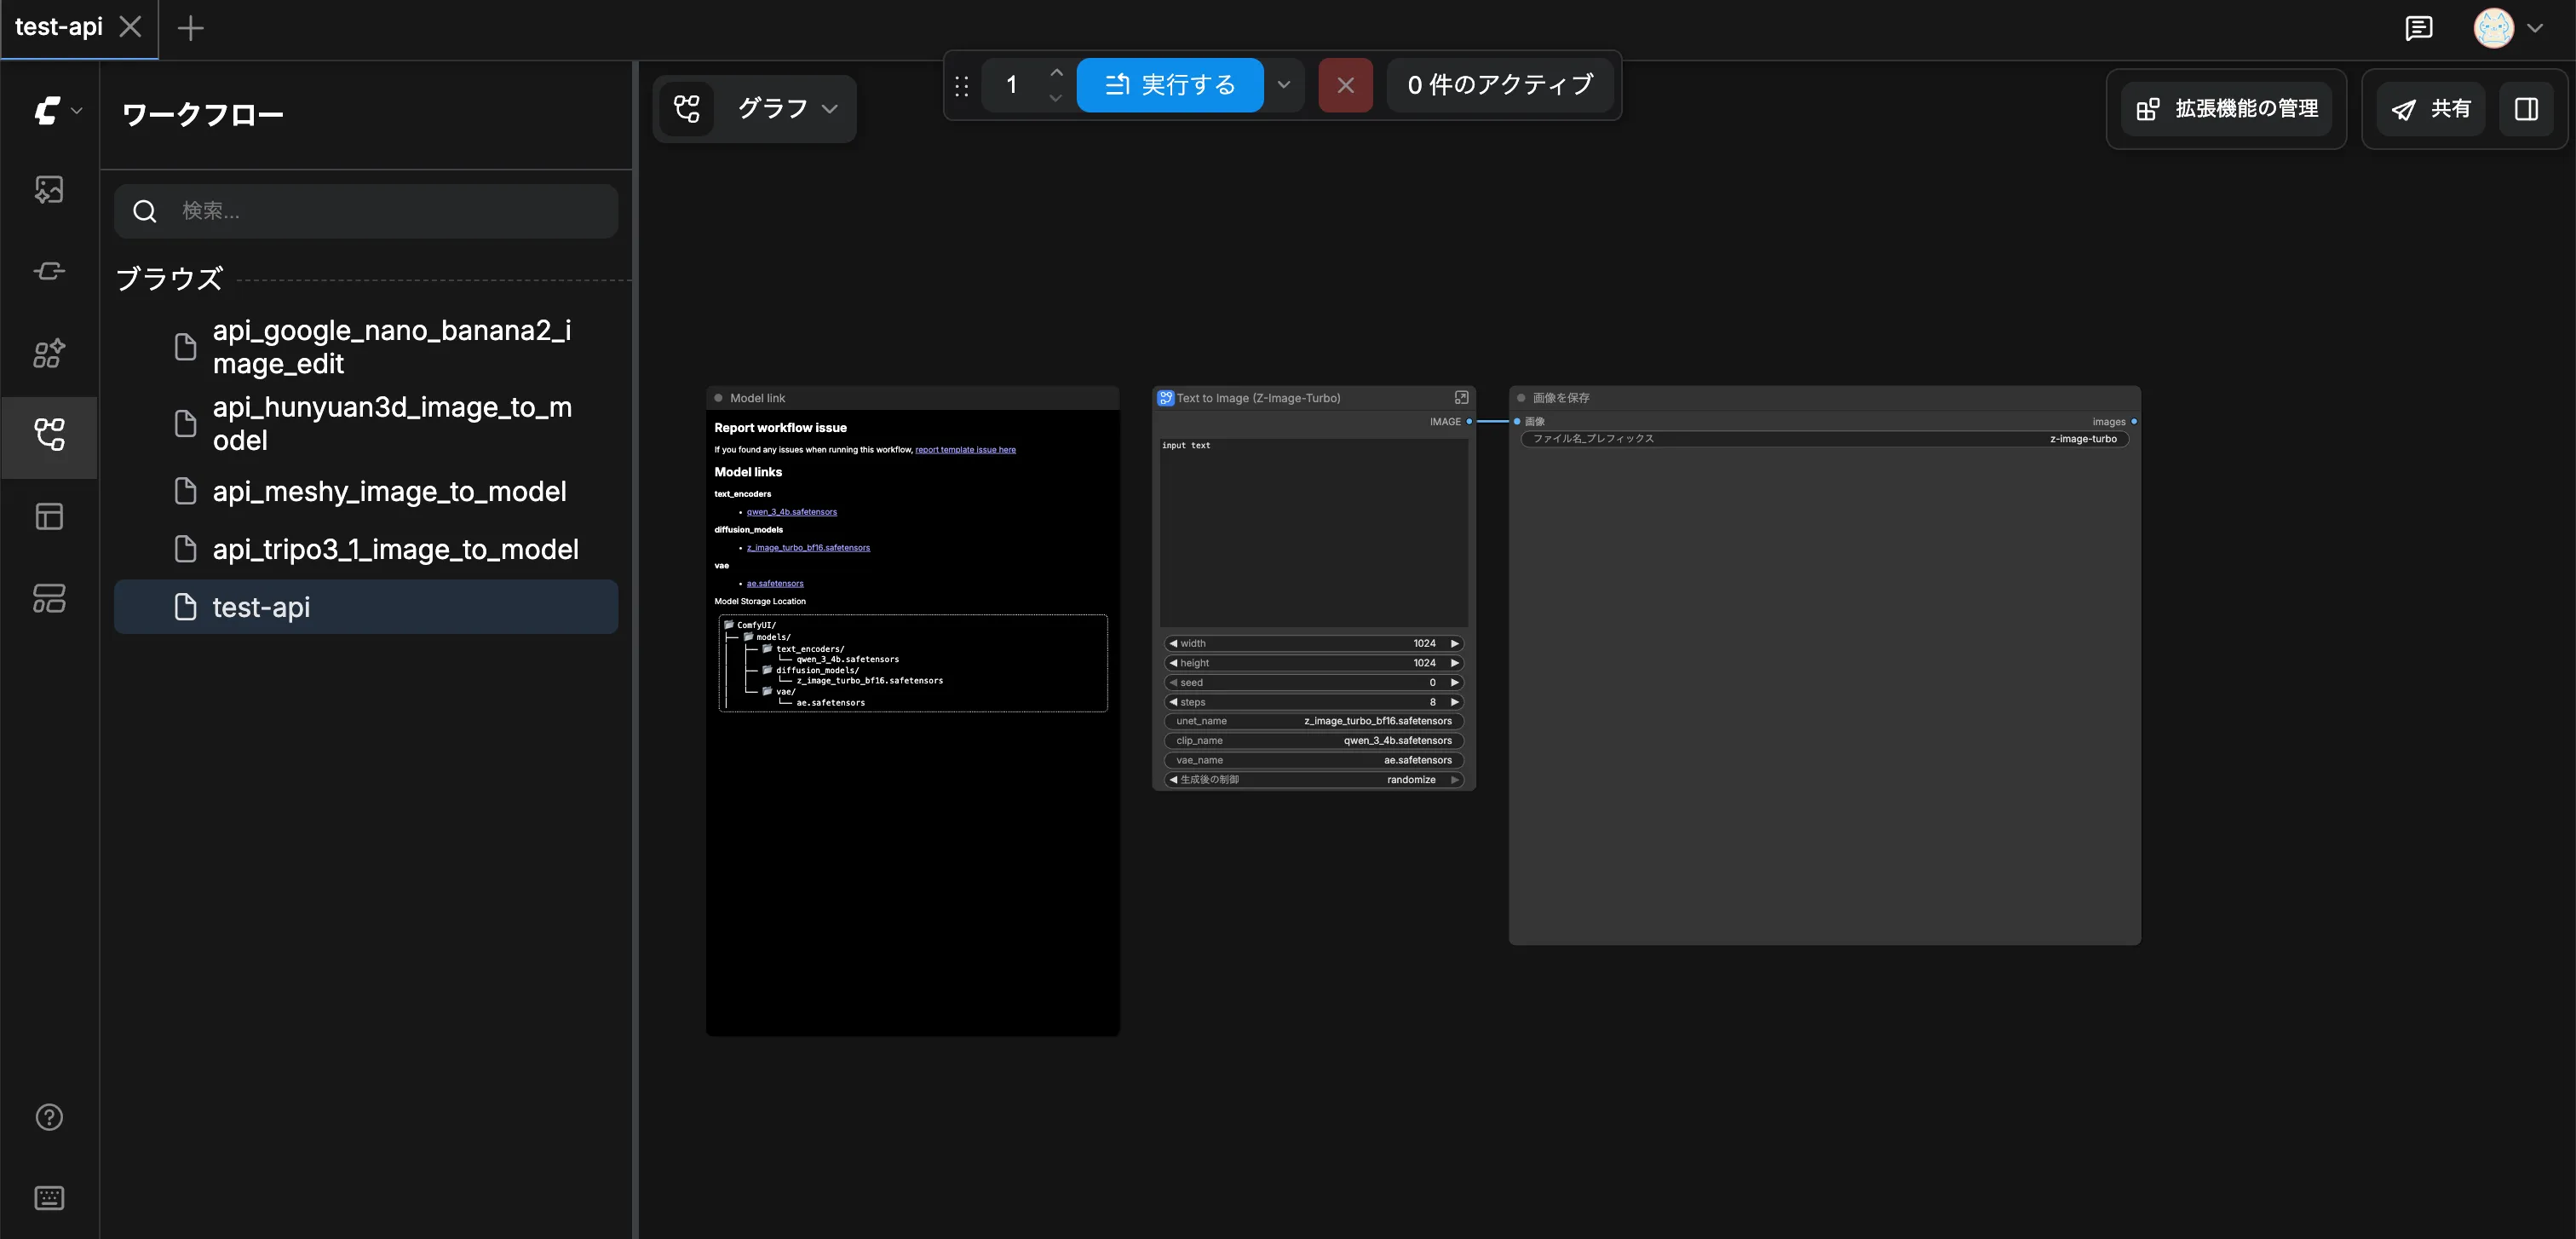
For the walkthrough I used a simple test-api workflow.
- Make sure it reaches a SaveImage node (so you don’t miss outputs)
- Note which node
inputsyou’ll override later (prompt, seed, …) - If you use Partner Nodes, confirm they run cleanly in the browser first
Step 2. Export the workflow in API format
The JSON you send to the Cloud API is not the normal save format.
Per Workflow API Format, you must export API format.
| Aspect | Save format | API format (Export Workflow API) |
|---|---|---|
| Menu | File → Save | File → Export Workflow (API) |
| Node keys | Titles / labels | Numeric node IDs |
| UI metadata | Positions, colors, groups, … | Stripped |
| Use | Re-edit in the editor | API submission |
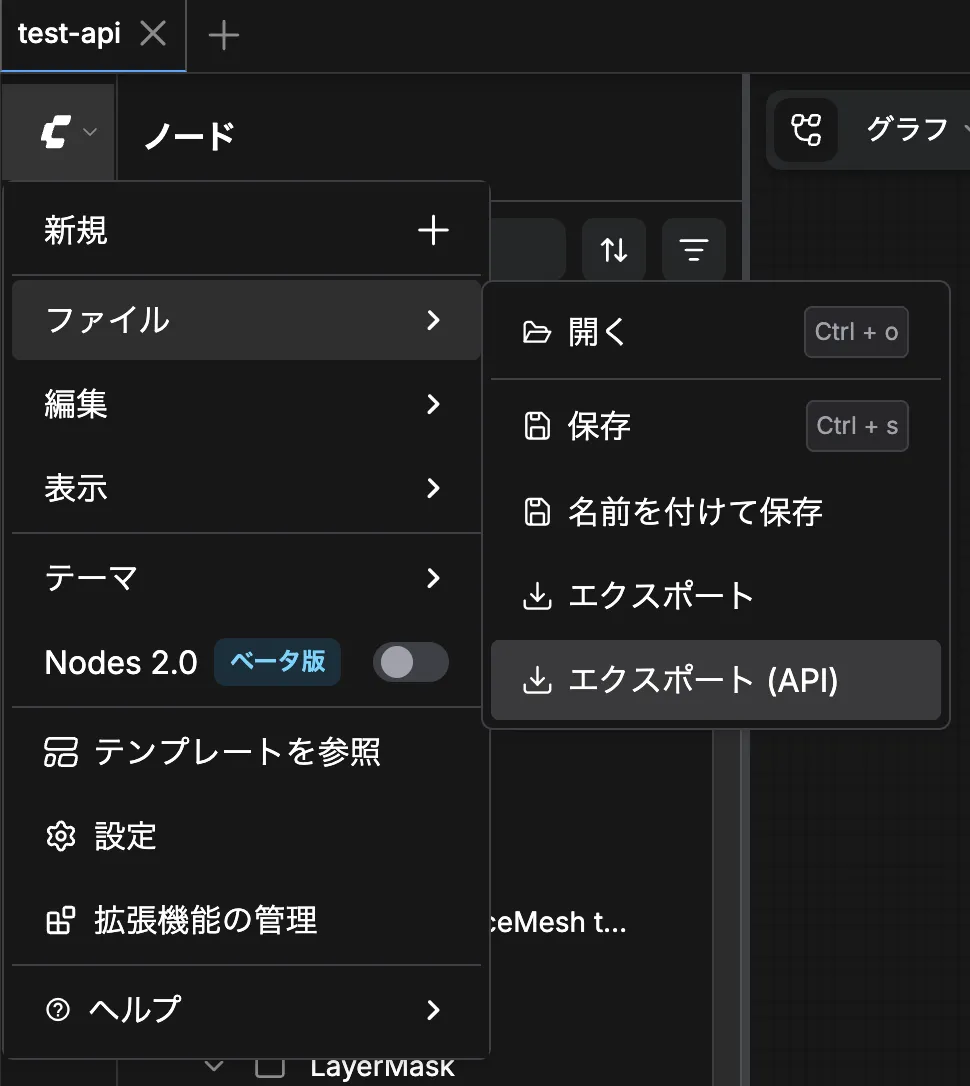
Export steps:
- Open the workflow in the editor
- Choose
File → Export Workflow (API)(Japanese UI:ファイル → エクスポート (API)) - Save the downloaded JSON (here:
test-api.json)
For test-api, the exported JSON looks like this (from test-api.json):
{
  "9": {
    "inputs": {
      "filename_prefix": "test_api",
      "images": ["57:8", 0]
    },
    "class_type": "SaveImage",
    "_meta": {
      "title": "画像を保存"
    }
  },
  "62": {
    "inputs": {
      "filename_prefix": "ComfyUI",
      "format": "png",
      "format.bit_depth": "8-bit",
      "format.input_color_space": "sRGB"
    },
    "class_type": "SaveImageAdvanced",
    "_meta": {
      "title": "Save Image (Advanced)"
    }
  },
  "57:30": {
    "inputs": {
      "clip_name": "qwen_3_4b.safetensors",
      "type": "lumina2",
      "device": "default"
    },
    "class_type": "CLIPLoader",
    "_meta": {
      "title": "CLIPを読み込む"
    }
  },
  "57:29": {
    "inputs": {
      "vae_name": "ae.safetensors"
    },
    "class_type": "VAELoader",
    "_meta": {
      "title": "VAEを読み込む"
    }
  },
  "57:33": {
    "inputs": {
      "conditioning": ["57:27", 0]
    },
    "class_type": "ConditioningZeroOut",
    "_meta": {
      "title": "条件付けゼロアウト"
    }
  },
  "57:8": {
    "inputs": {
      "samples": ["57:3", 0],
      "vae": ["57:29", 0]
    },
    "class_type": "VAEDecode",
    "_meta": {
      "title": "VAEデコード"
    }
  },
  "57:28": {
    "inputs": {
      "unet_name": "z_image_turbo_bf16.safetensors",
      "weight_dtype": "default"
    },
    "class_type": "UNETLoader",
    "_meta": {
      "title": "拡散モデルを読み込む"
    }
  },
  "57:27": {
    "inputs": {
      "text": "input text",
      "clip": ["57:30", 0]
    },
    "class_type": "CLIPTextEncode",
    "_meta": {
      "title": "CLIPテキストエンコード(プロンプト)"
    }
  },
  "57:13": {
    "inputs": {
      "width": 1024,
      "height": 1024,
      "batch_size": 1
    },
    "class_type": "EmptySD3LatentImage",
    "_meta": {
      "title": "空のSD3潜在画像"
    }
  },
  "57:11": {
    "inputs": {
      "shift": 3,
      "model": ["57:28", 0]
    },
    "class_type": "ModelSamplingAuraFlow",
    "_meta": {
      "title": "モデルサンプリングオーラフロー"
    }
  },
  "57:3": {
    "inputs": {
      "seed": 0,
      "steps": 8,
      "cfg": 1,
      "sampler_name": "res_multistep",
      "scheduler": "simple",
      "denoise": 1,
      "model": ["57:11", 0],
      "positive": ["57:27", 0],
      "negative": ["57:33", 0],
      "latent_image": ["57:13", 0]
    },
    "class_type": "KSampler",
    "_meta": {
      "title": "Kサンプラー"
    }
  }
}
Handy node IDs to override:
| Goal | Node ID | Field |
|---|---|---|
| Change prompt | "57:27" | inputs.text |
| Change seed | "57:3" | inputs.seed |
| Output prefix | "9" | inputs.filename_prefix |
Step 3. Get an API key
Cloud API auth uses a Comfy Platform API key.
Steps are in Getting an API Key.
- Log in at platform.comfy.org/login
- In API Keys, click
+ New API Key - Name it and Generate
- Copy the key immediately (it won’t be shown again)
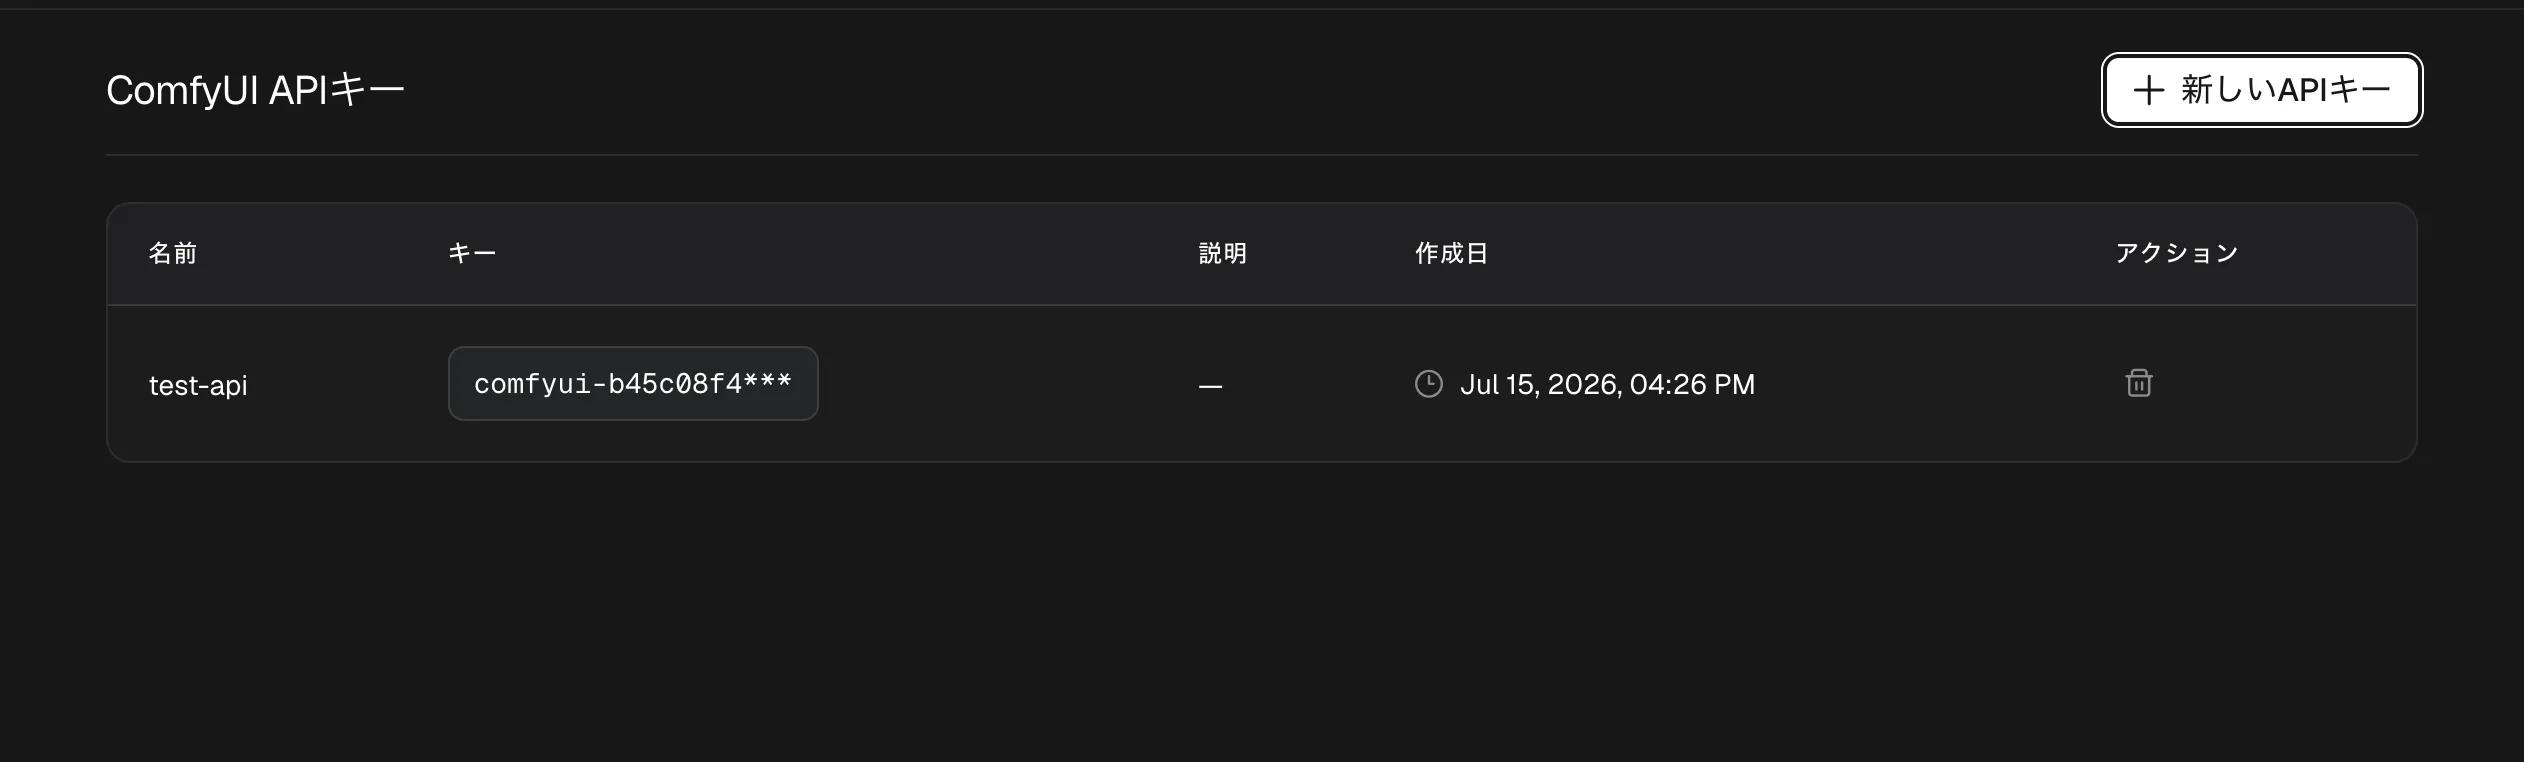
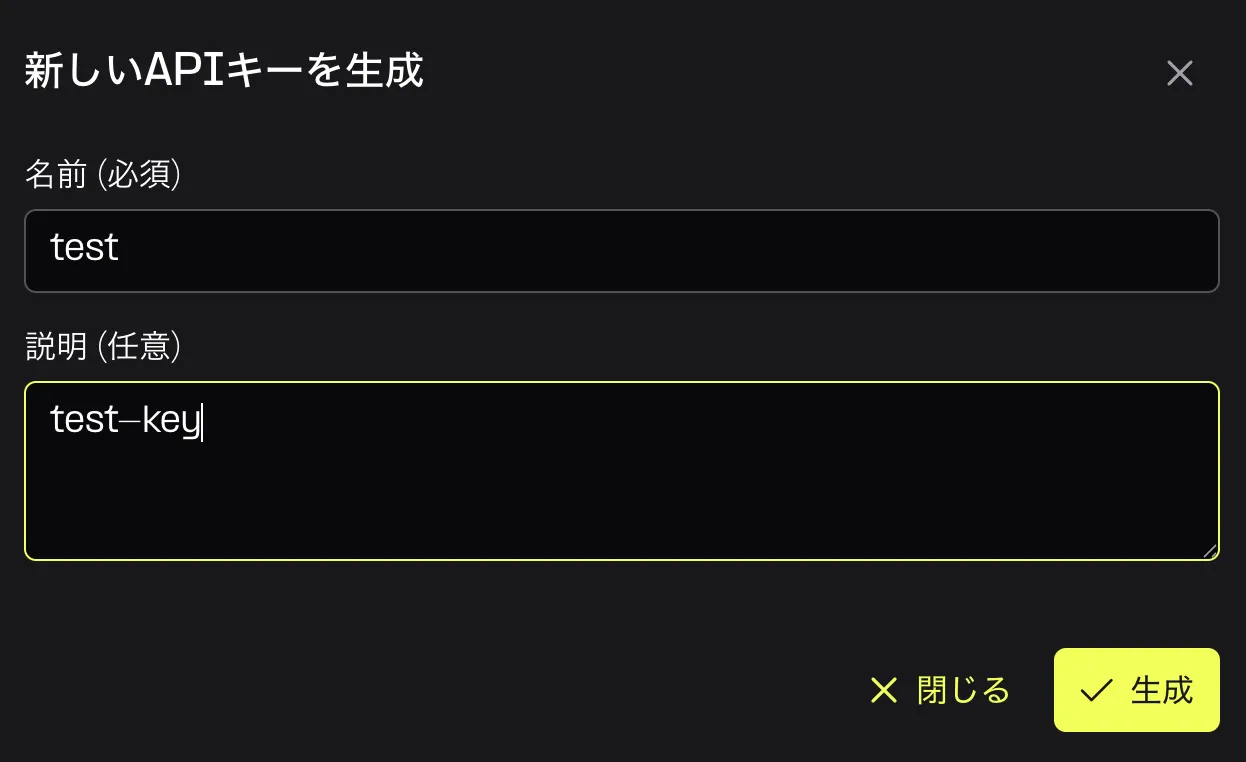
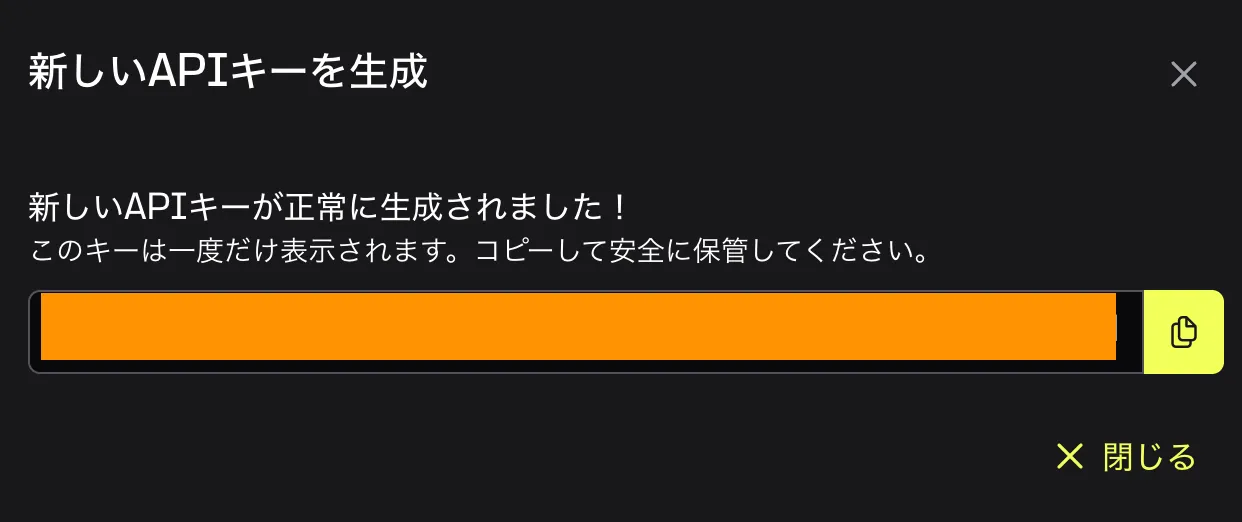
Store it in an env var:
export COMFY_CLOUD_API_KEY="comfyui-xxxxxxxxxxxx"
export BASE_URL="https://cloud.comfy.org"
Smoke-test with the user info endpoint.
I started in Postman.
curl -X GET "$BASE_URL/api/user" \
  -H "X-API-Key: $COMFY_CLOUD_API_KEY"
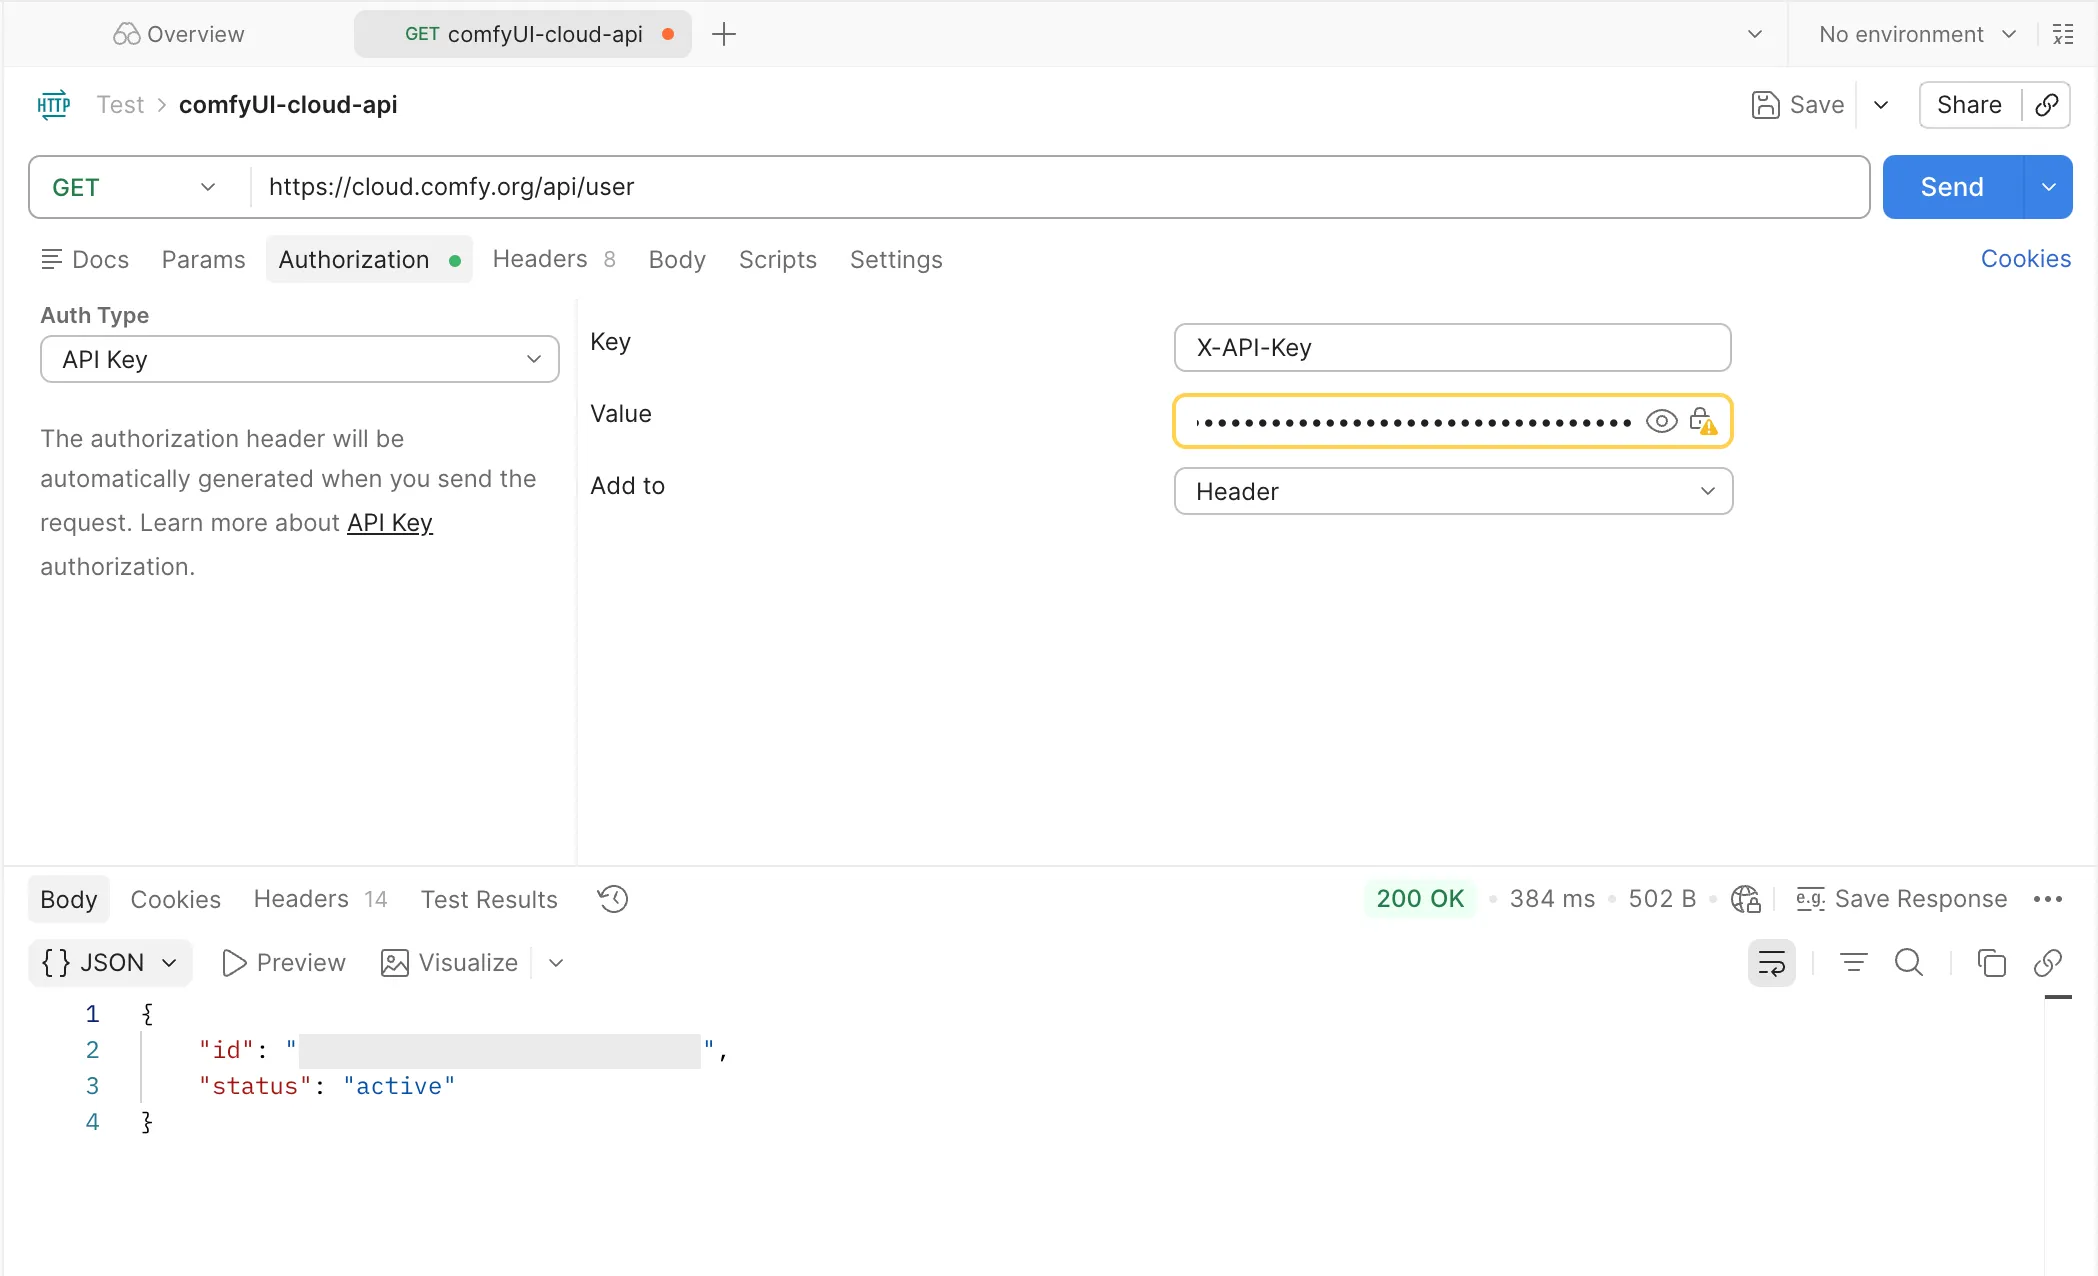
In Postman:
- Method
GET, URLhttps://cloud.comfy.org/api/user - Authorization → Type API Key
- Key
X-API-Key, Value = your key, Add to Header - Send
200 OK with something like {"id":"...","status":"active"} means the key works.
Step 4. Pass inputs and run the workflow via API
This is the main part.
Per the official Quick Start, send API-format JSON in the prompt field of POST /api/prompt.
Submit from Postman (before writing code)
You can hit the same endpoint from Postman first.
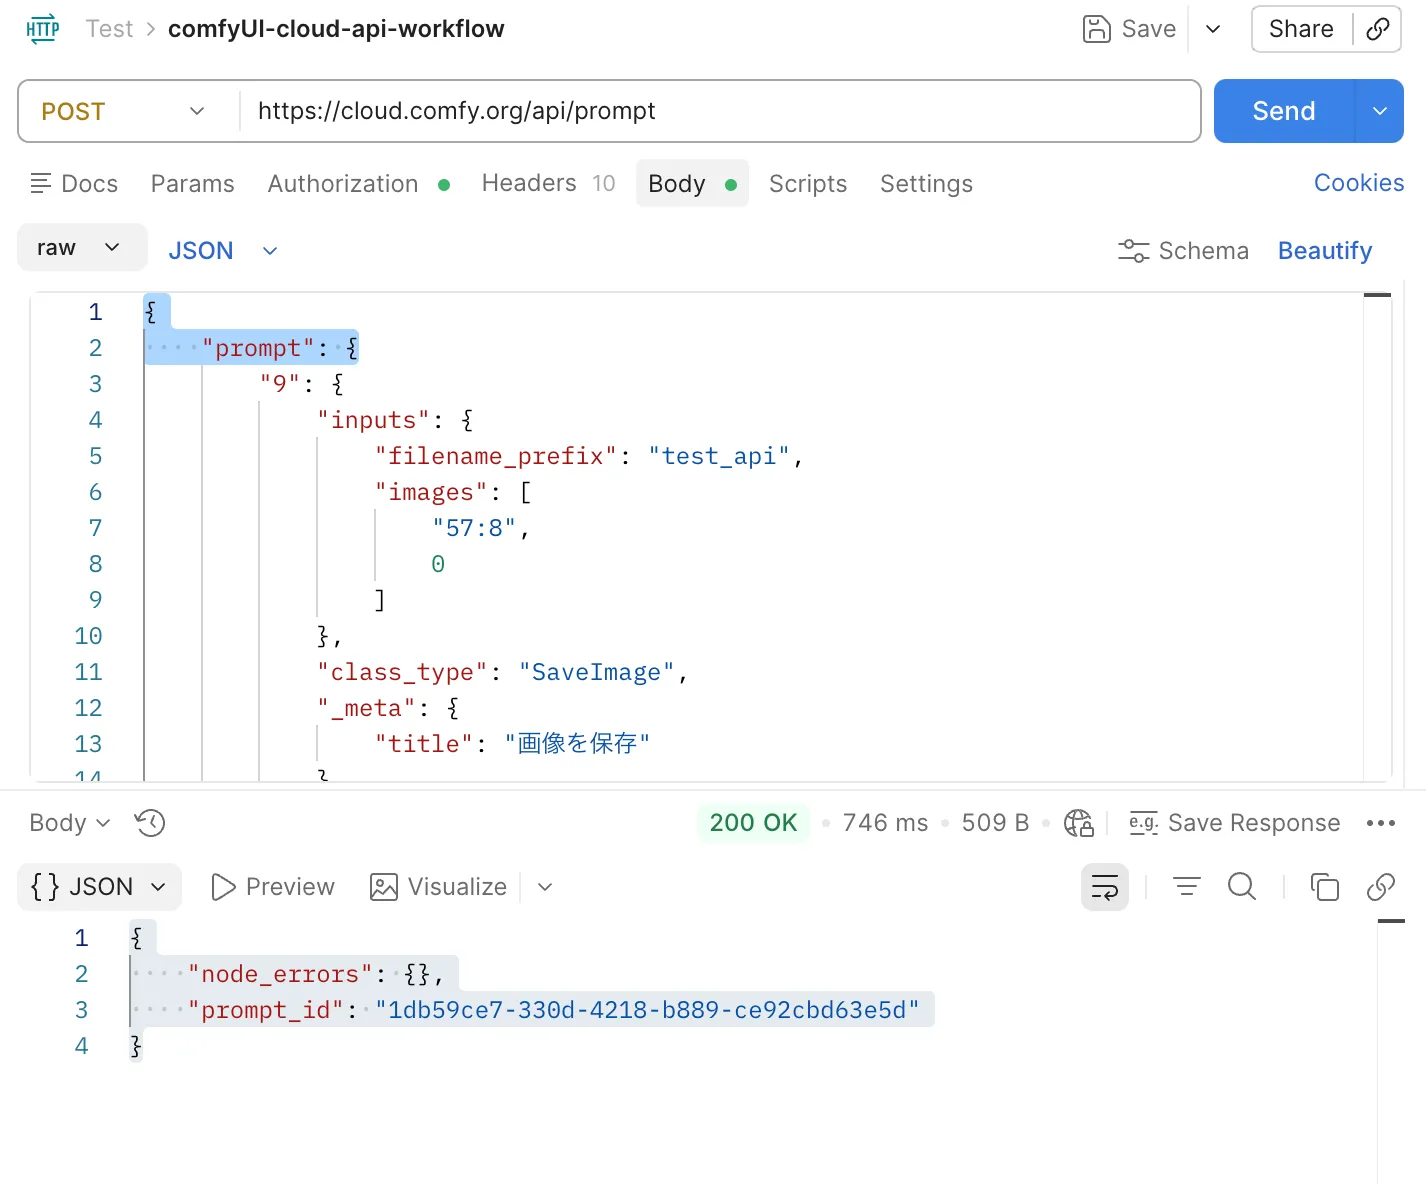
Important: don’t paste exported test-api.json as the raw body root — wrap it in prompt.
- Method
POST, URLhttps://cloud.comfy.org/api/prompt - Auth same as Step 3 (
X-API-Keyheader) - Body → raw → JSON
- Send a body shaped like this (put the entire
test-api.jsoninsideprompt; the snippet below is structural):
{
  "prompt": {
    "9": { "...": "SaveImage nodes, etc. — full test-api.json contents" },
    "57:27": {
      "inputs": {
        "text": "rewrite with any prompt you want",
        "clip": ["57:30", 0]
      },
      "class_type": "CLIPTextEncode"
    }
  }
}
The easy footgun is pasting test-api.json at the body root.
Always use {"prompt": { ...contents of test-api.json... }}.
To change the text prompt, edit "57:27" → inputs.text in the body, then Send.
On success you get a prompt_id, same as curl / Python:
{
  "prompt_id": "xxxxxxxx-xxxx-xxxx-xxxx-xxxxxxxxxxxx",
  "number": 1,
  "node_errors": {}
}
You can also check progress in Postman:
GET https://cloud.comfy.org/api/job/{prompt_id}/status- Same
X-API-Keyauth
That’s enough to validate keys and body shape before writing code.
Submit as-is (curl)
curl -X POST "$BASE_URL/api/prompt" \
  -H "X-API-Key: $COMFY_CLOUD_API_KEY" \
  -H "Content-Type: application/json" \
  -d '{"prompt": '"$(cat test-api.json)"'}'
Typical success response:
{
  "prompt_id": "xxxxxxxx-xxxx-xxxx-xxxx-xxxxxxxxxxxx",
  "number": 1,
  "node_errors": {}
}
prompt_id is the job ID for monitoring and downloads.
From Postman it looked like this:
Rewrite inputs, then submit (Python)
In real use you usually load the export and swap seed / prompt before sending.
The official Complete Example does the same.
import os
import json
import requests

BASE_URL = "https://cloud.comfy.org"
API_KEY = os.environ["COMFY_CLOUD_API_KEY"]

def get_headers():
    return {"X-API-Key": API_KEY, "Content-Type": "application/json"}

with open("test-api.json") as f:
    workflow = json.load(f)

# Node IDs must match your test-api.json (they differ per workflow)
workflow["57:3"]["inputs"]["seed"] = 42
workflow["57:27"]["inputs"]["text"] = "a cat wearing sunglasses, studio photo"

response = requests.post(
    f"{BASE_URL}/api/prompt",
    headers=get_headers(),
    json={"prompt": workflow},
)
response.raise_for_status()

result = response.json()
prompt_id = result["prompt_id"]
print(f"Job submitted: {prompt_id}")
Step 5. Monitor job progress
Jobs run asynchronously.
The docs cover polling and WebSocket.
Polling (simple)
Call GET /api/job/{prompt_id}/status on an interval.
| status | Meaning |
|---|---|
waiting_to_dispatch | Waiting to dispatch |
pending | Queued |
in_progress | Running |
success / completed | Success (live API often returns success; Quick Start examples say completed) |
error / failed | Failed |
cancelled | Cancelled |
My Postman response matched the OpenAPI JobStatusResponse on success:
{
  "id": "1db59ce7-330d-4218-b889-ce92cbd63e5d",
  "status": "success",
  "created_at": "2026-07-15T10:10:35.257831Z",
  "updated_at": "2026-07-15T10:10:41.014223Z",
  "last_state_update": "2026-07-15T10:10:41.014223Z",
  "assigned_inference": "10.4.35.14:8080",
  "error_message": null
}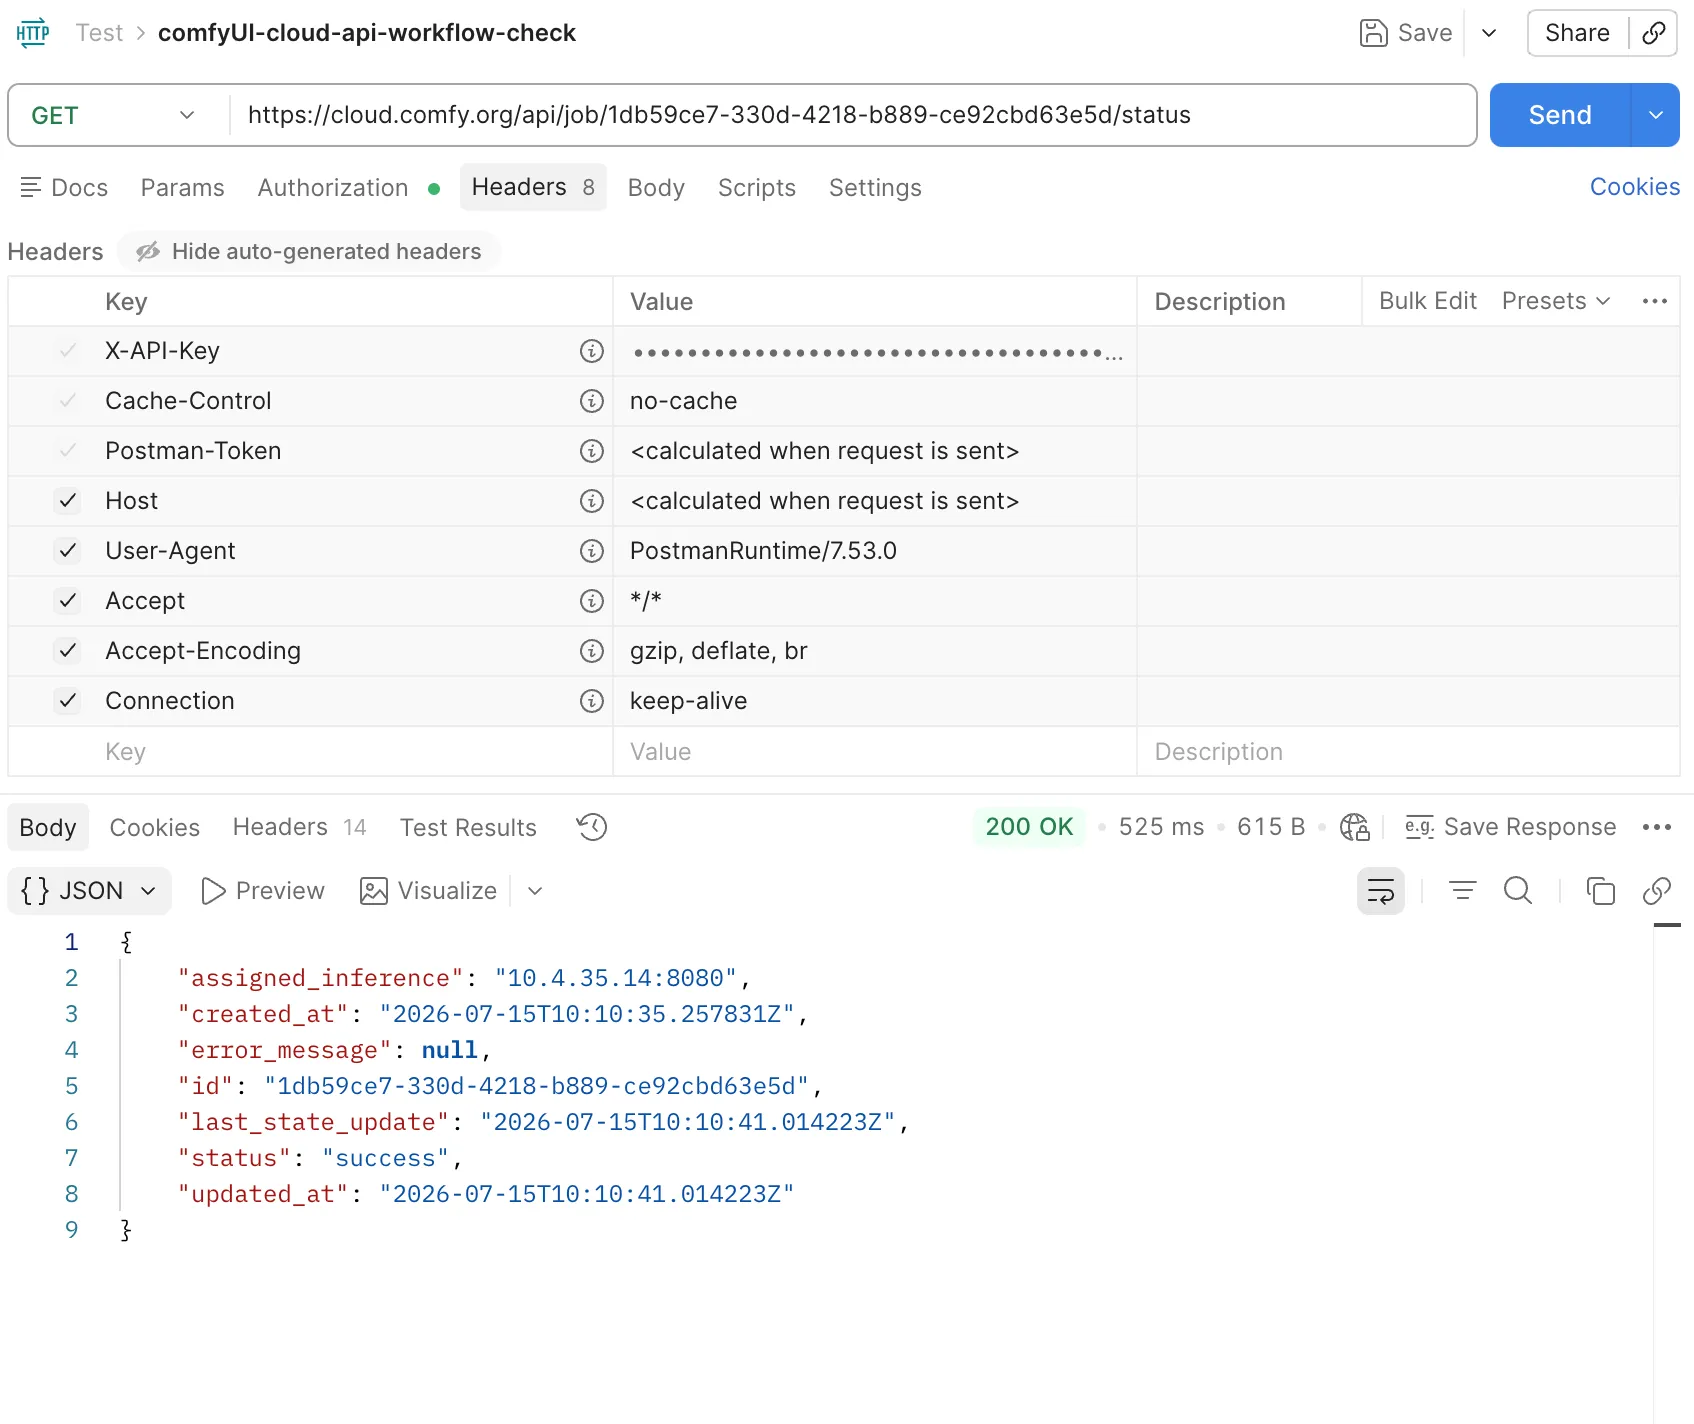
Important: the status API does not include filenames.
It’s enough to know “done,” but you still need the next step for filename.
curl -X GET "$BASE_URL/api/job/$PROMPT_ID/status" \
  -H "X-API-Key: $COMFY_CLOUD_API_KEY"
Python wait loop (also accepts live success):
import time

def poll_for_completion(prompt_id: str, timeout: int = 300, poll_interval: float = 2.0) -> None:
    start_time = time.time()

    while time.time() - start_time < timeout:
        status_res = requests.get(
            f"{BASE_URL}/api/job/{prompt_id}/status",
            headers=get_headers(),
        )
        status_res.raise_for_status()
        status = status_res.json()["status"]

        if status in ("success", "completed"):
            return
        if status in ("error", "failed", "cancelled"):
            raise RuntimeError(f"Job failed with status: {status}")

        time.sleep(poll_interval)

    raise TimeoutError(f"Job {prompt_id} did not complete within {timeout}s")

poll_for_completion(prompt_id)
print("Job completed!")
WebSocket (realtime)
Prefer WebSocket if you want progress bars or per-node logs.
wss://cloud.comfy.org/ws?clientId={uuid}&token={api_key}You’ll get messages like executing / progress / executed / execution_success — filter by prompt_id.
See the Cloud API Overview WebSocket section.
My first message in Postman looked like:
{
  "type": "status",
  "data": {
    "status": {
      "exec_info": {
        "queue_remaining": 0
      }
    },
    "sid": "31d0726d-635d-4a94-aaf5-1c862db38bbc"
  }
}
WebSocket is great for queue and progress.
It doesn’t reliably surface the final image filename for download, though.
For artifacts, Step 6’s job-details API was clearer for me.
Step 6. Download the output
You need filename (and maybe subfolder / type).
After the job finishes, get those from the job details API.
Get outputs and filenames
Endpoint: GET /api/jobs/{prompt_id} (Get full job details).
Note the path differs from /api/job/.../status (job singular vs jobs plural).
curl -X GET "$BASE_URL/api/jobs/$PROMPT_ID" \
  -H "X-API-Key: $COMFY_CLOUD_API_KEY"
In Postman:
- Method
GET - URL
https://cloud.comfy.org/api/jobs/{prompt_id} - Same
X-API-Keyauth - Send
My response looked roughly like this (long workflow / execution_status.messages omitted):
{
  "id": "1db59ce7-330d-4218-b889-ce92cbd63e5d",
  "status": "completed",
  "outputs_count": 1,
  "execution_status": {
    "completed": true,
    "status_str": "success"
  },
  "outputs": {
    "9": {
      "images": [
        {
          "display_name": "test_api_00001_.png",
          "filename": "7e4a58ad6987c5ab0e833e1933ae88409f2d16cafcb46258dd917b55b321a5f5.png",
          "subfolder": "",
          "type": "output"
        }
      ]
    }
  },
  "preview_output": {
    "filename": "7e4a58ad6987c5ab0e833e1933ae88409f2d16cafcb46258dd917b55b321a5f5.png",
    "mediaType": "images",
    "nodeId": "9",
    "subfolder": "",
    "type": "output"
  }
}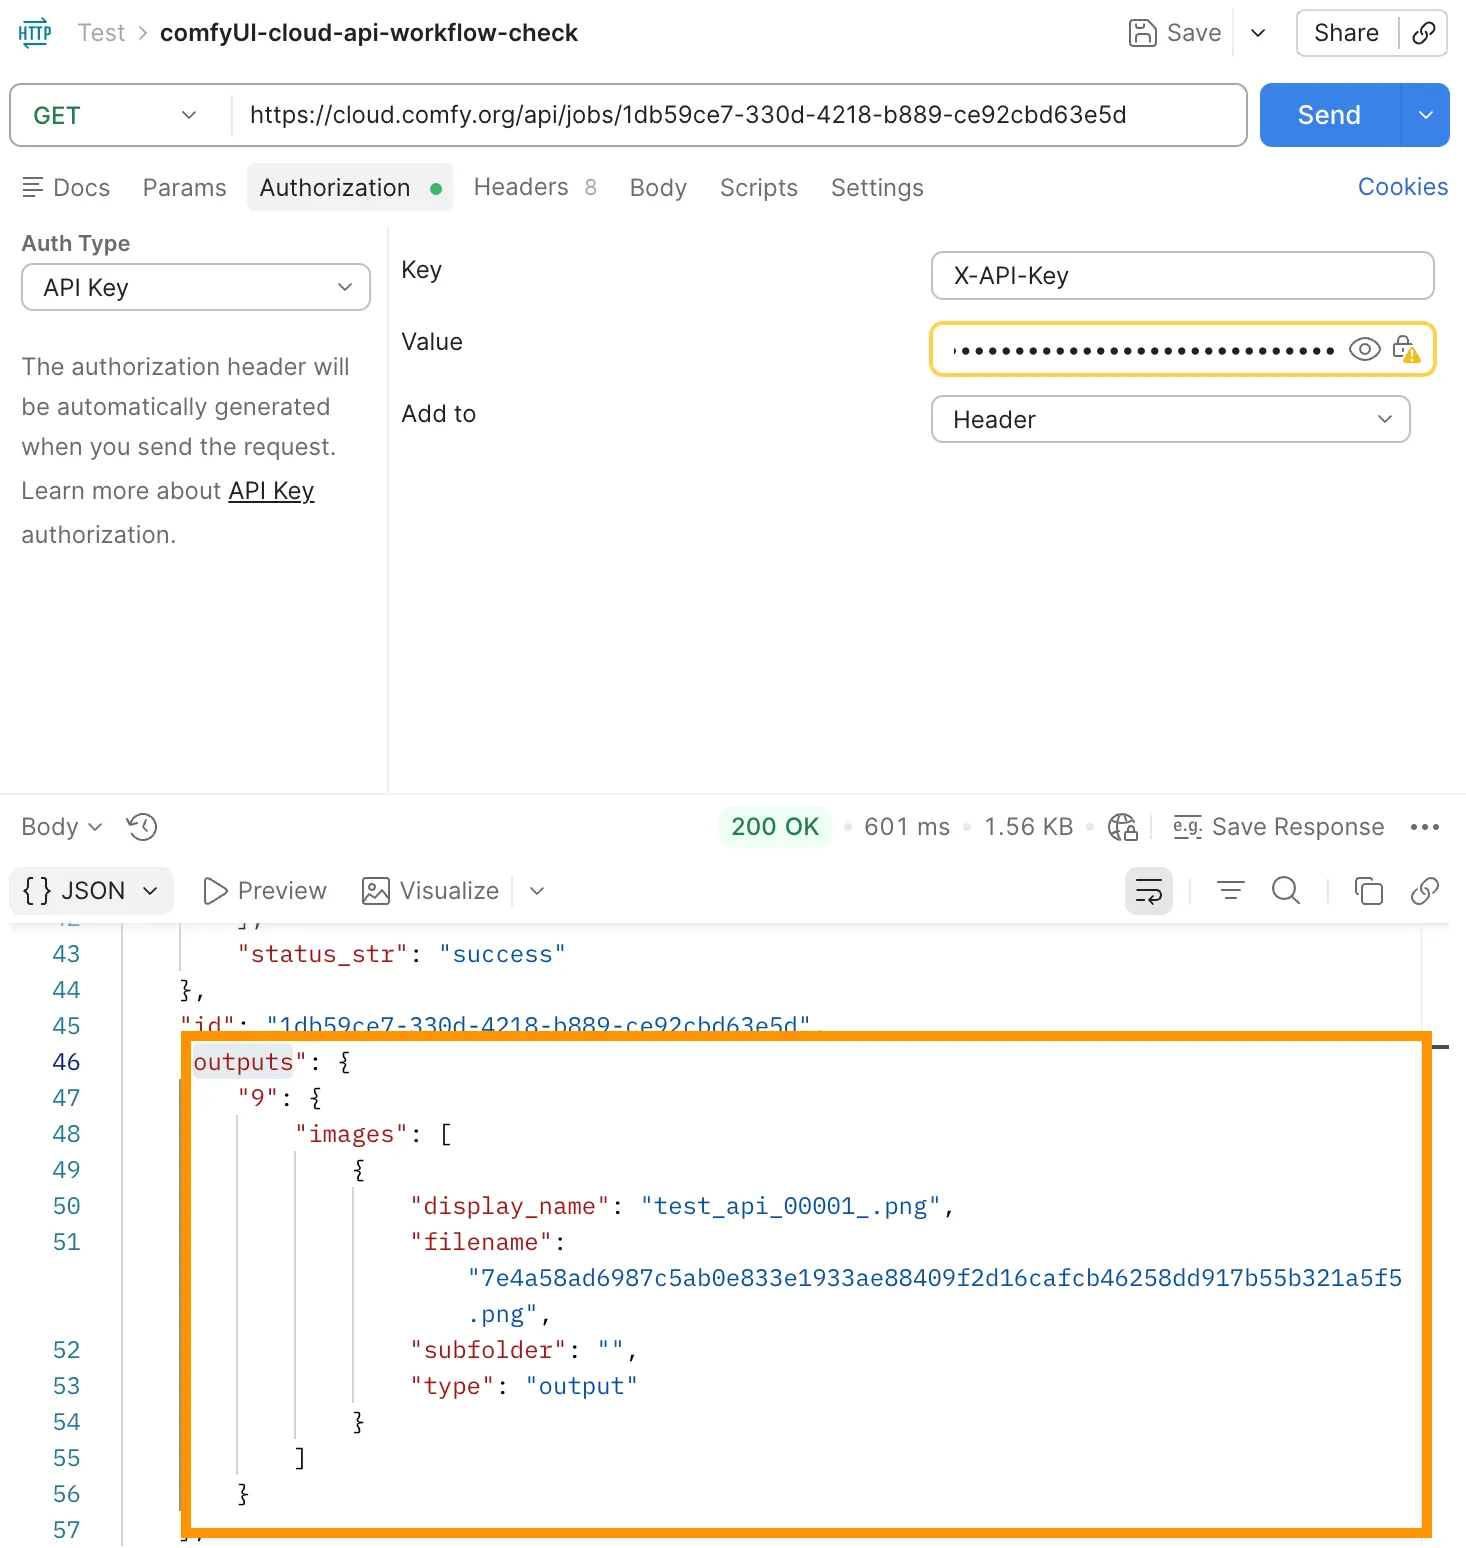
outputs is what you need for download:
| Field | Example | Use |
|---|---|---|
filename | Long hash-like .png | Pass to /api/view (Cloud content-addressed name) |
display_name | test_api_00001_.png | Human-friendly name (from SaveImage filename_prefix) |
subfolder | "" | Empty unless you set one |
type | output | Also passed to /api/view |
Always use filename (the hash) with /api/view. display_name won’t work.
job_res = requests.get(
    f"{BASE_URL}/api/jobs/{prompt_id}",
    headers=get_headers(),
)
job_res.raise_for_status()
outputs = job_res.json()["outputs"]

for node_id, node_outputs in outputs.items():
    for file_info in node_outputs.get("images", []):
        print(
            node_id,
            file_info["filename"],
            file_info.get("display_name"),
            file_info.get("type", "output"),
        )
If you’re on WebSocket, executed message output can also carry file info.
In Postman I copied filename from job details, then downloaded.
Download the file bytes
Use GET /api/view.
# Use the hash filename from outputs
curl -L "$BASE_URL/api/view?filename=7e4a58ad6987c5ab0e833e1933ae88409f2d16cafcb46258dd917b55b321a5f5.png&subfolder=&type=output" \
  -H "X-API-Key: $COMFY_CLOUD_API_KEY" \
  -o test_api_00001_.png
Saving as display_name (here test_api_00001_.png) keeps local files readable.
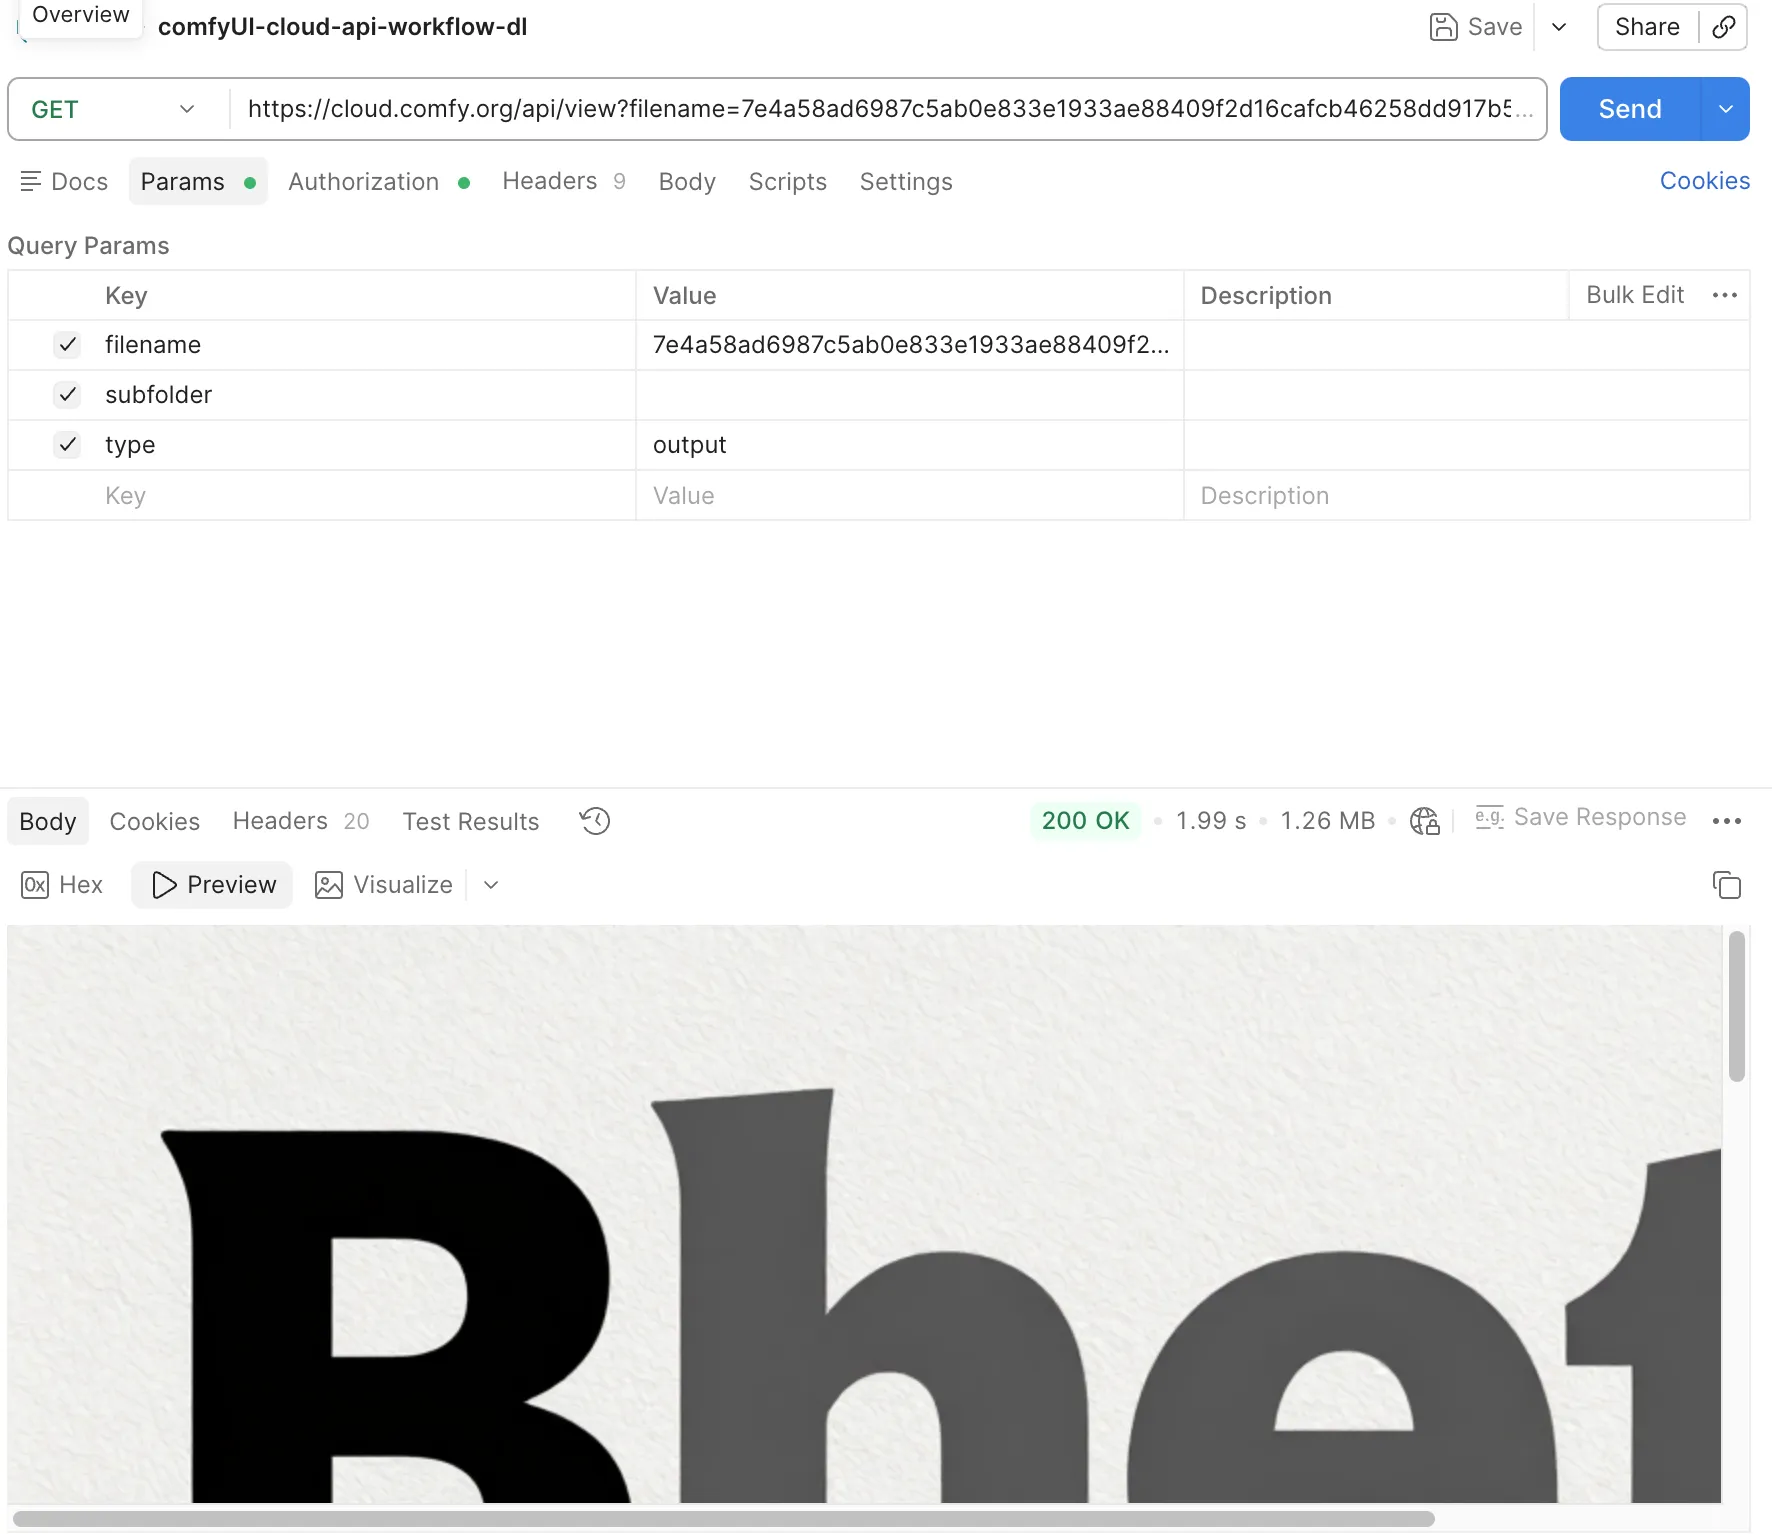
In Postman, set Params filename (hash) / subfolder / type, GET, then Save Response → Save to a file.
An image preview means it worked.
Python batch save:
for node_outputs in outputs.values():
    for file_info in node_outputs.get("images", []):
        params = {
            "filename": file_info["filename"],  # hash side
            "subfolder": file_info.get("subfolder", ""),
            "type": file_info.get("type", "output"),
        }
        view_res = requests.get(
            f"{BASE_URL}/api/view",
            headers=get_headers(),
            params=params,
        )
        view_res.raise_for_status()

        # Save locally as display_name when present
        save_as = file_info.get("display_name") or file_info["filename"]
        with open(save_as, "wb") as f:
            f.write(view_res.content)
        print(f"Downloaded: {save_as}")
After an API run, the same result shows up in the browser workflow UI.
With SaveImage prefix test_api, the sidebar listed test_api_00001_.
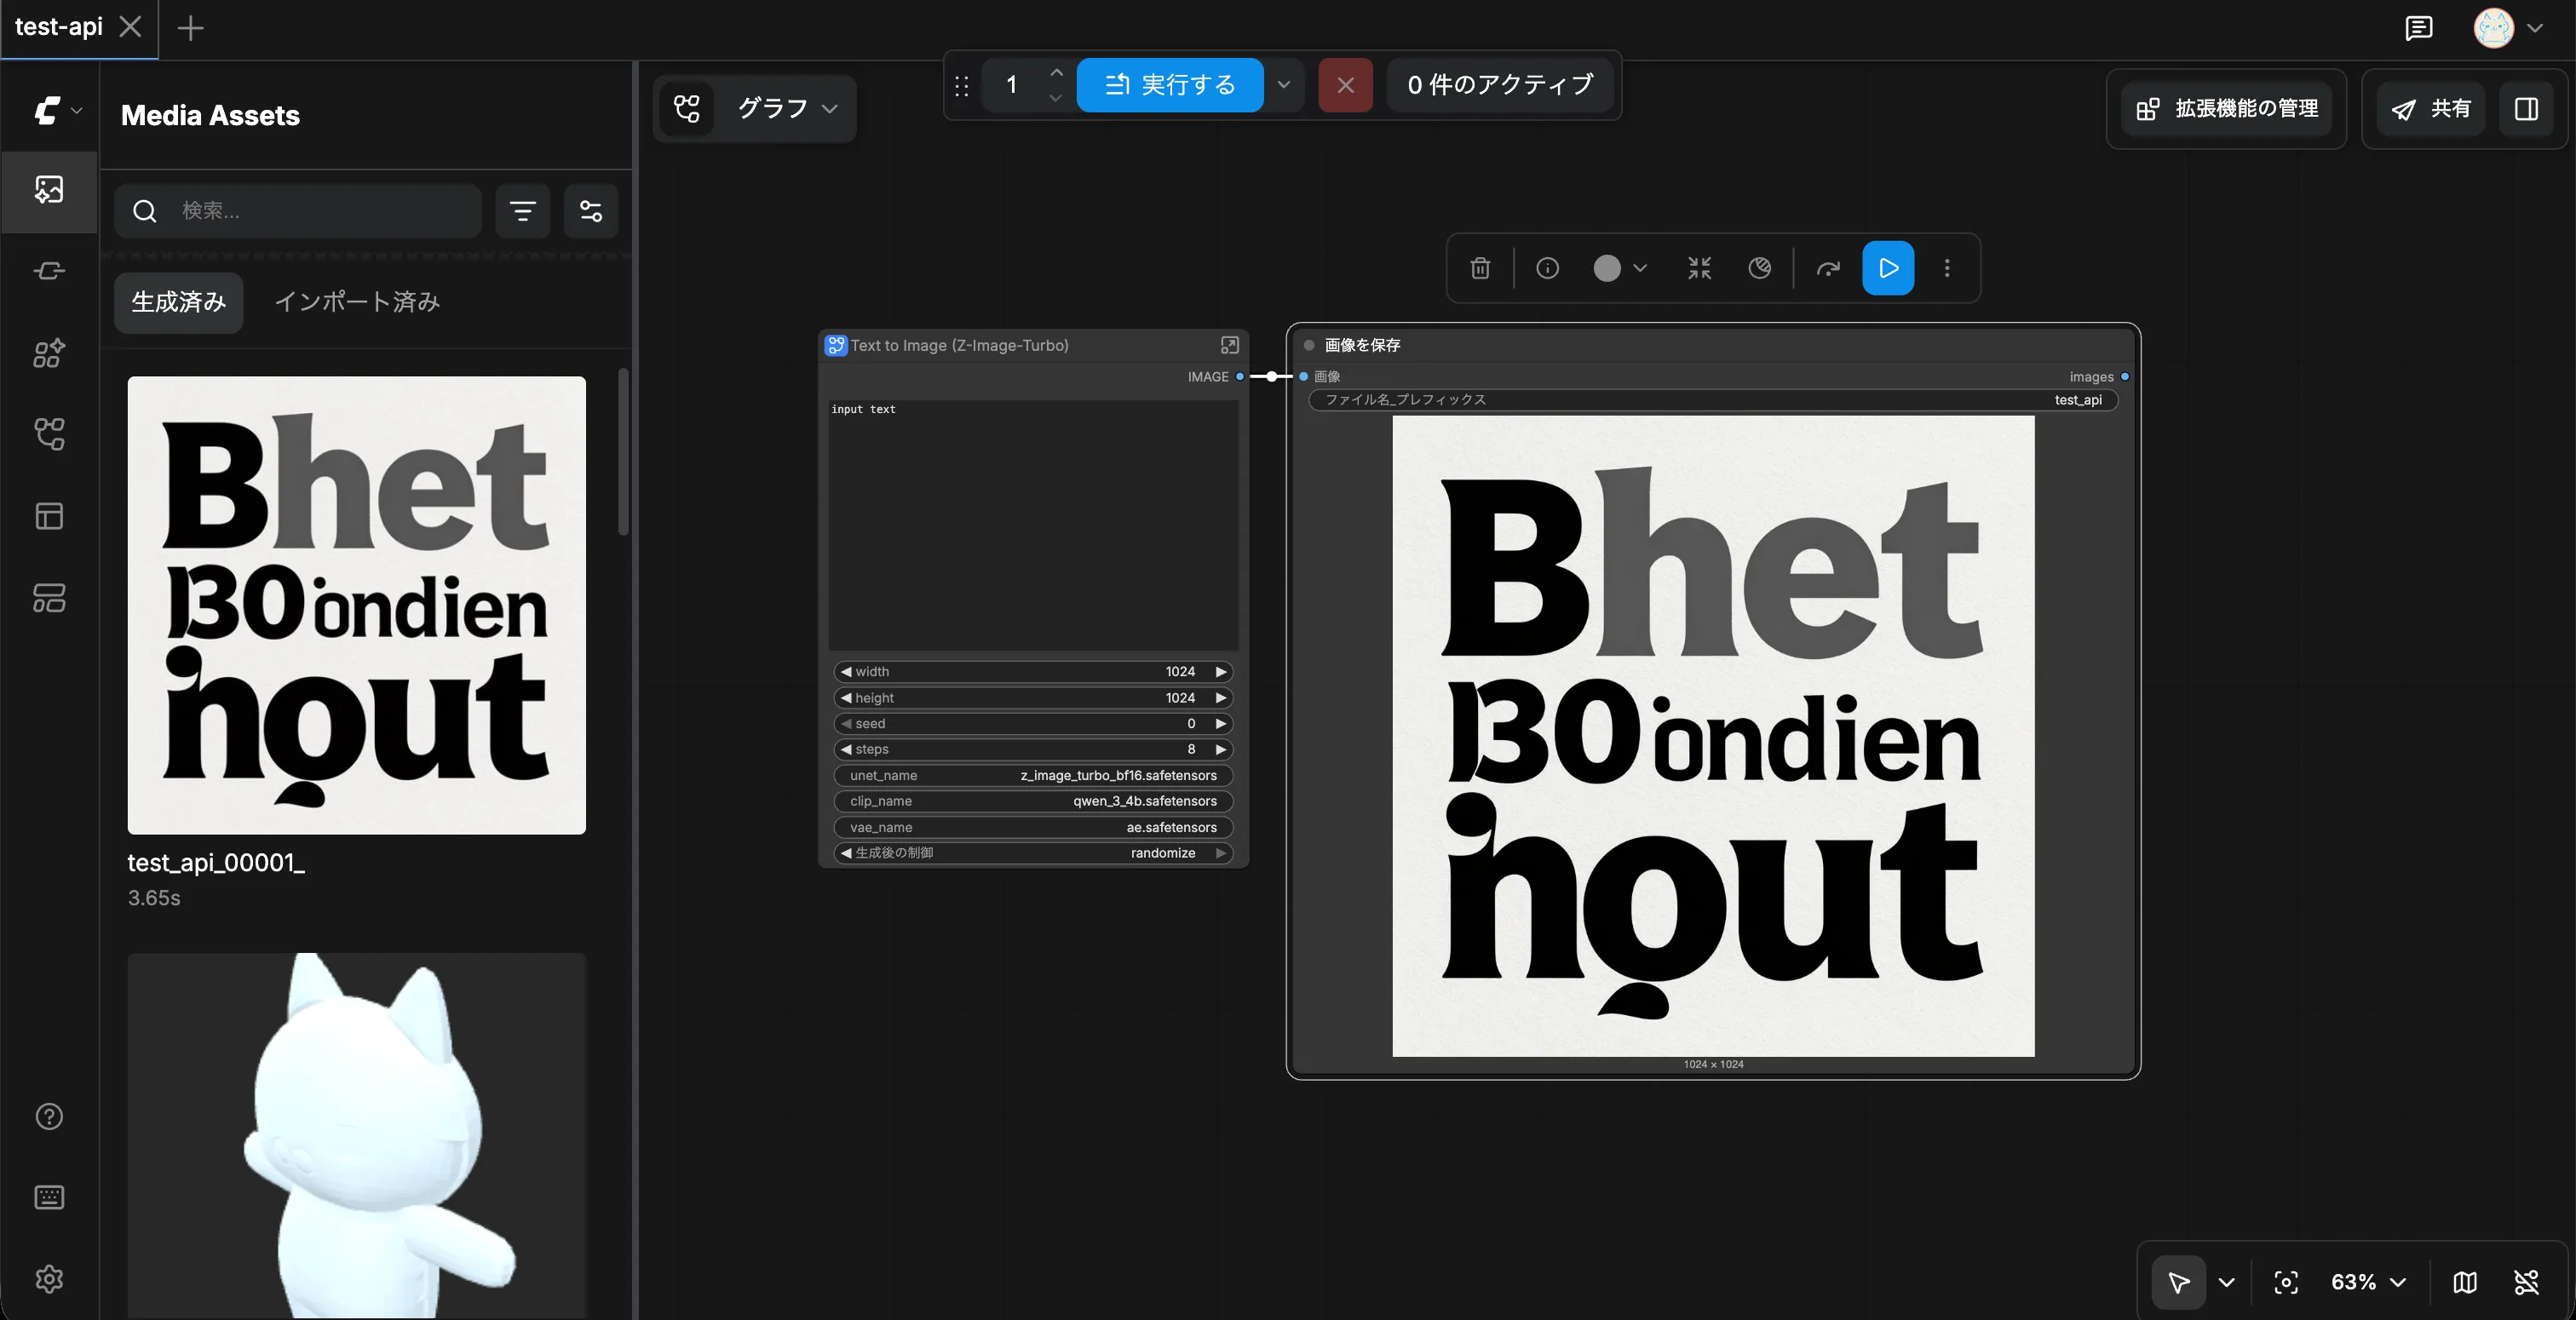
If the PNG matches what you’d get from clicking Run in the UI, the full API path is working.
All-in-one Python sample
Putting the steps together (based on the official Complete Example):
import os
import json
import time
import requests

BASE_URL = "https://cloud.comfy.org"
API_KEY = os.environ["COMFY_CLOUD_API_KEY"]

def get_headers():
    return {"X-API-Key": API_KEY, "Content-Type": "application/json"}

def main():
    # 1. Load workflow and rewrite inputs
    with open("test-api.json") as f:
        workflow = json.load(f)

    workflow["57:3"]["inputs"]["seed"] = 42
    workflow["57:27"]["inputs"]["text"] = "a beautiful sunset"

    # 2. Submit job
    response = requests.post(
        f"{BASE_URL}/api/prompt",
        headers=get_headers(),
        json={"prompt": workflow},
    )
    response.raise_for_status()
    prompt_id = response.json()["prompt_id"]
    print(f"Job submitted: {prompt_id}")

    # 3. Poll until done
    while True:
        status_res = requests.get(
            f"{BASE_URL}/api/job/{prompt_id}/status",
            headers=get_headers(),
        )
        status_res.raise_for_status()
        status = status_res.json()["status"]

        if status in ("success", "completed"):
            break
        if status in ("error", "failed", "cancelled"):
            raise RuntimeError(f"Job {status}")
        time.sleep(2)

    # 4. Fetch outputs
    job_res = requests.get(
        f"{BASE_URL}/api/jobs/{prompt_id}",
        headers=get_headers(),
    )
    job_res.raise_for_status()
    outputs = job_res.json()["outputs"]

    # 5. Save files
    for node_outputs in outputs.values():
        for file_info in node_outputs.get("images", []):
            params = {
                "filename": file_info["filename"],
                "subfolder": file_info.get("subfolder", ""),
                "type": "output",
            }
            view_res = requests.get(
                f"{BASE_URL}/api/view",
                headers=get_headers(),
                params=params,
            )
            view_res.raise_for_status()
            save_as = file_info.get("display_name") or file_info["filename"]
            with open(save_as, "wb") as f:
                f.write(view_res.content)
            print(f"Downloaded: {save_as}")

if __name__ == "__main__":
    main()
If you already automate local ComfyUI, this API’s strength is that you can often swap base URL + API key and reuse a lot of the same script.
Takeaways from trying it
- A workflow that runs in the browser ports to API cleanly (Export Workflow API does the heavy lifting)
- Input swaps are just editing JSON
inputs— nice for batching and external services - For first connectivity, hit
/api/user→/api/promptin Postman before writing code - In job details
outputs,filenameis the hash,display_nameis the readable name — pass the hash to/api/view - Free can’t run the API, so you need a paid plan to verify
- It’s labeled Experimental — worth rechecking the docs now and then
Parallel job limits depend on plan (Standard 1 / Creator 3 / Pro 5).
For flooding multiple prompts, see the official parallel sample.
Comfy Cloud invite link
If you haven’t tried Comfy Cloud yet:
👉 Sign up for Comfy Cloud (invite link)
For real API use you need Standard or above, plus an API key from platform.comfy.org.
References
- Comfy Cloud (affiliate link)
- Cloud API Overview — official Quick Start
- Cloud API Reference — endpoint details
- Workflow API Format — API format
- Getting an API Key
- Comfy Cloud pricing
- Related: ComfyUI vs Comfy Cloud (local vs cloud)
Wrap-up
Official docs are solid and clear.
Screenshots are a bit sparse though, so I hope this helps as a first studio-style walkthrough.
Before you automate or mass-produce, start by generating one image through the API.