I actually shipped my iOS app, LIFE OFFICE, so here’s a record of how it went from an idea to the App Store.
It started with my own laziness
Once I went freelance, I noticed I could get shockingly lazy, both in the morning and during work hours.
As an employee, the commute and a fixed start time forced some structure on my day. Once that was gone, my days started drifting and ended up drifting too.
I figured I needed some kind of “okay, let’s go” switch, and that’s where this app started.
I thought if I could recreate the satisfying click of an old-school timecard on a phone, it could become that ritual for me.
I also wanted to fix how vague my working hours had become as a freelancer, so tracking and visualizing clock-in and clock-out times became a second goal.
No GPS, no company integration — just a personal clock-in app.
From idea to mockup
Instead of jumping straight into code, I started by turning the idea into pictures.
First, I used ChatGPT to generate a rough image to lock in the general direction.
From there, I used Claude Design and Google Stitch to work out the layout and components for each screen in more detail.
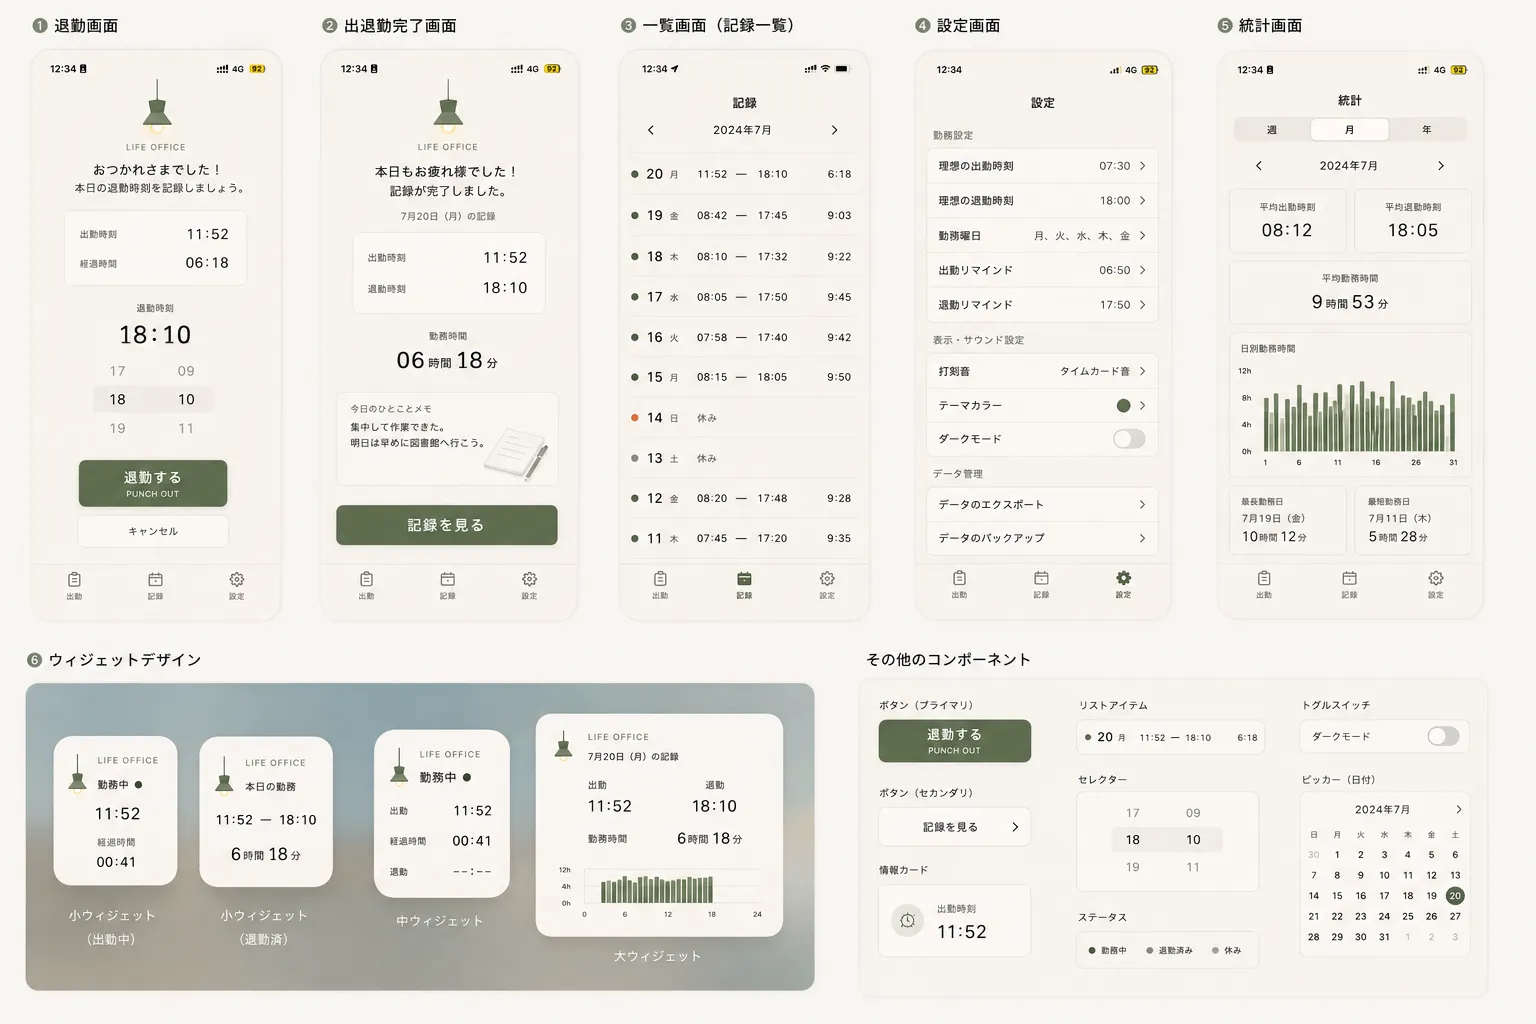
Laying out all the main screens like this up front made a real difference once I moved on to implementation.
Instead of leaving things vague, I pinned down button placement and how much detail each screen should show — which kept my instructions to the AI consistent later on.
Building it with detailed instructions to Claude Code
This was my first time building an iOS app with Expo.
I’d touched React Native before, but never a solo project that included punch animations, shake detection, and a widget extension.
Even so, by giving Claude Code detailed, feature-by-feature instructions, I got further than I expected as a first-timer.
The workflow was roughly: describe what state a screen should hold, how a piece of data should be saved, then implement it through that back-and-forth — showing the mockup image again whenever we got out of sync.
Here’s the punch screen that came out of it.
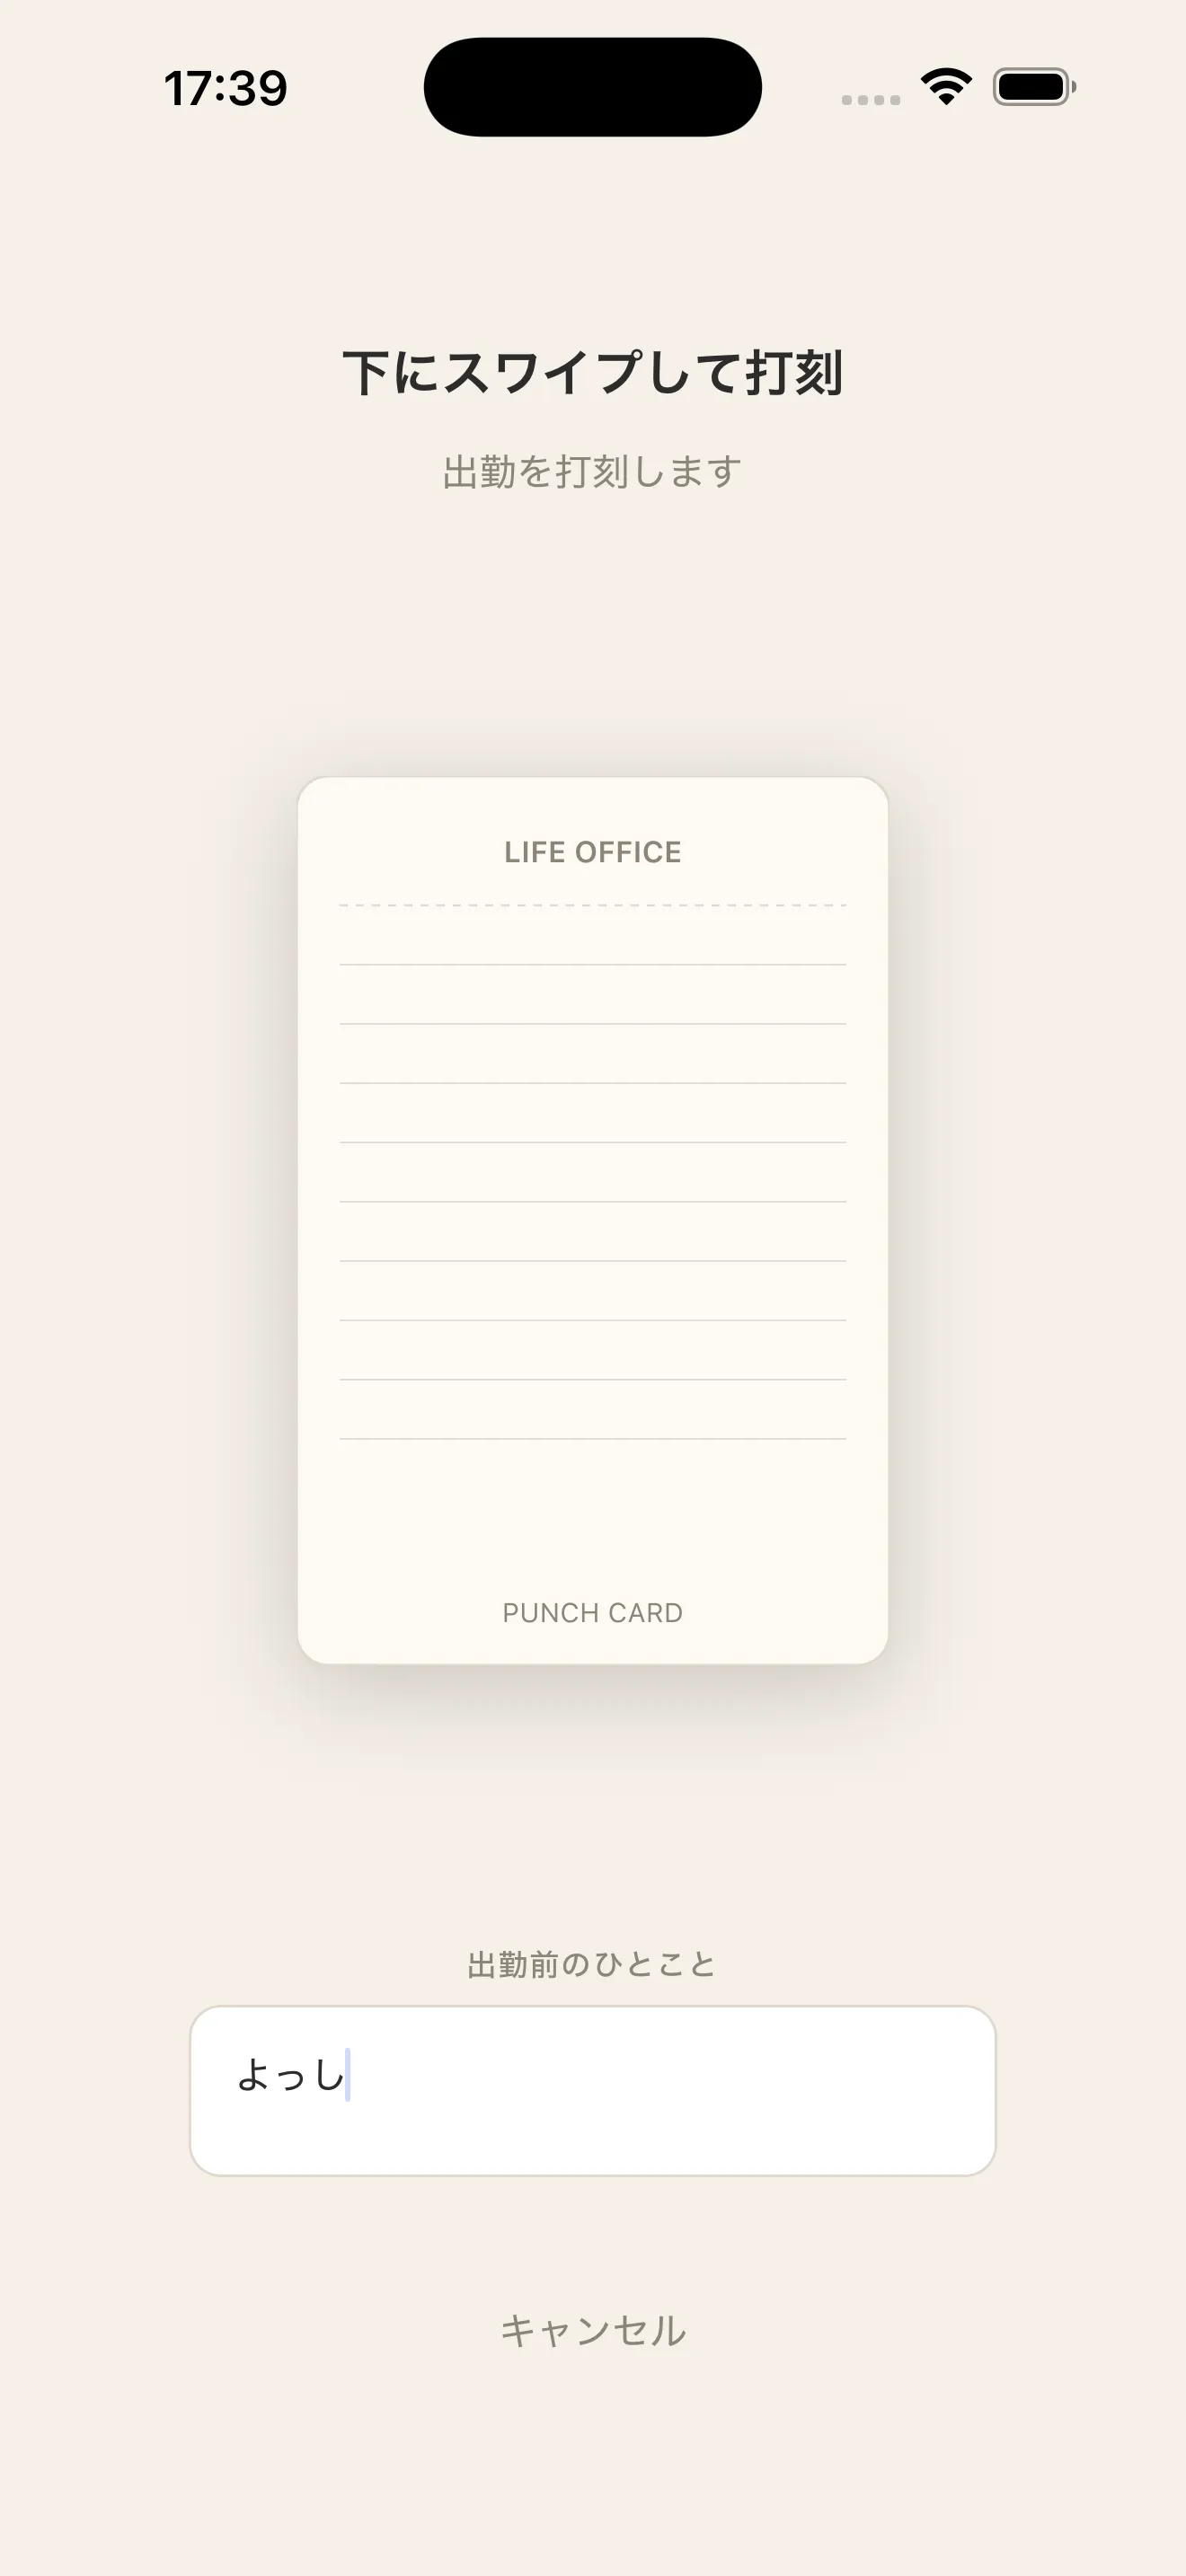
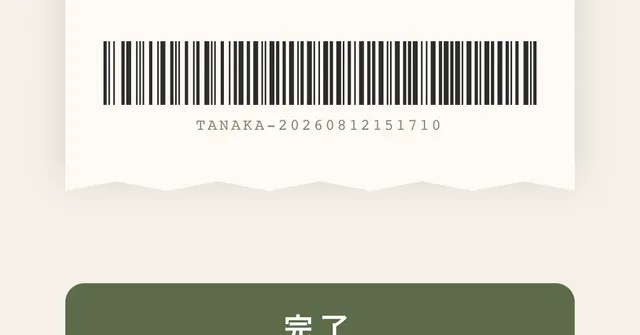
Swipe down and a receipt-style result appears, ready to save to Photos or share right away.
That combination of the swipe and the receipt is, for me, the part that feels most like an actual ritual.
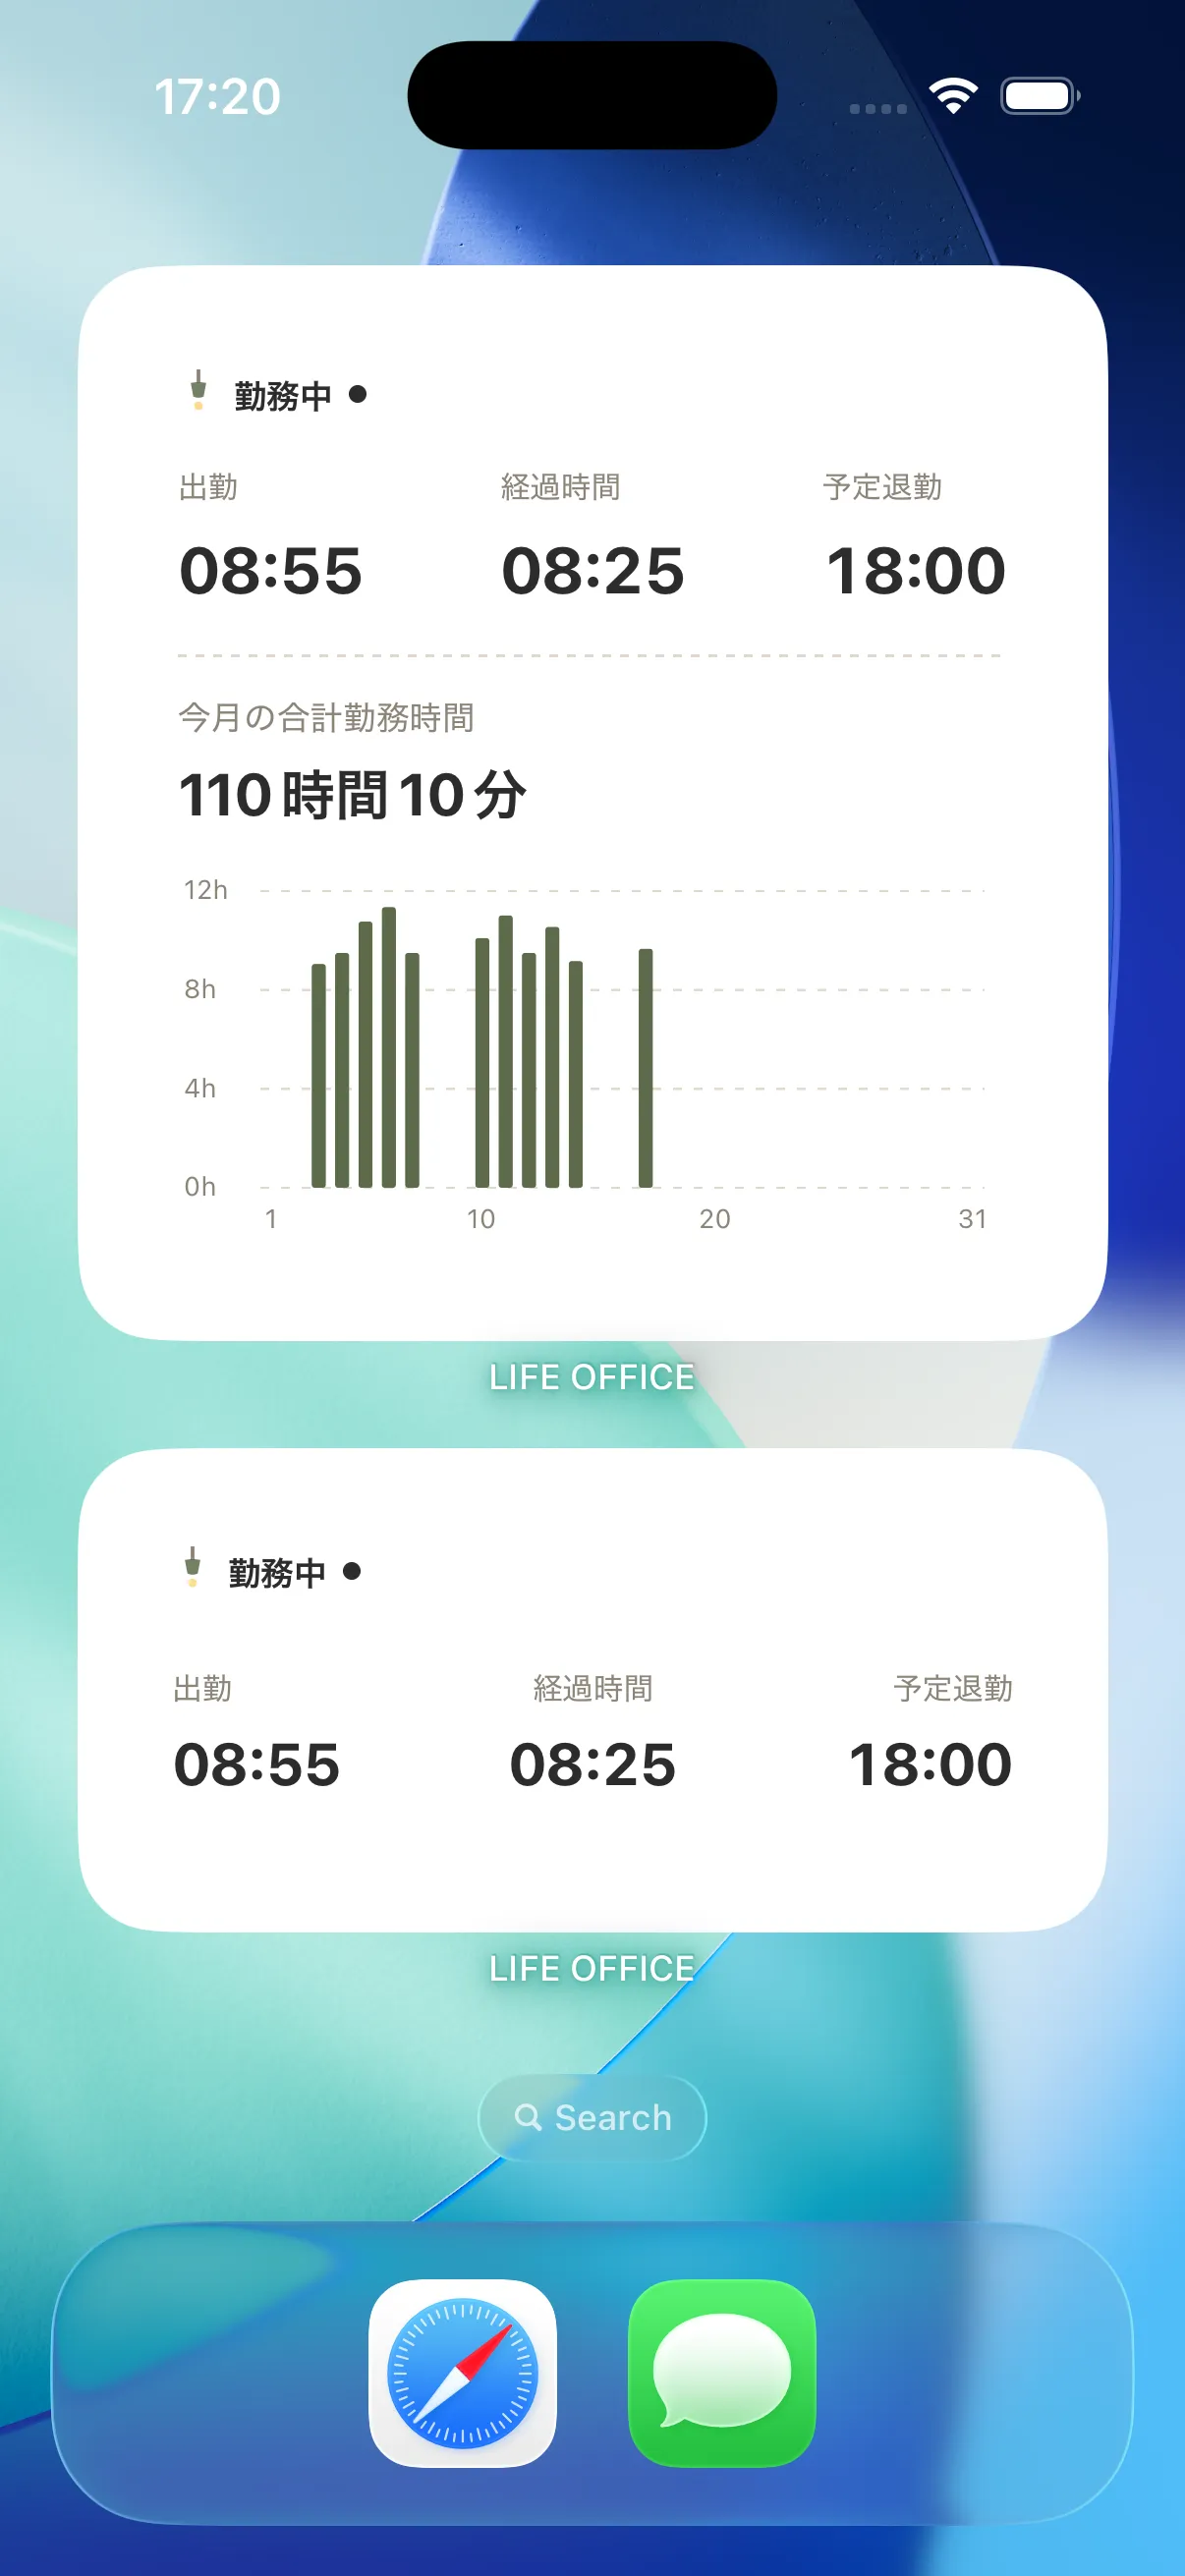
The widget: built on Expo, but with a custom plugin underneath
The Home Screen widget was the one piece Expo’s standard tooling couldn’t cover on its own.
Expo’s config plugins don’t ship with WidgetKit extension support out of the box, so I wrote my own Expo Module for it: modules/life-office-widget.
It has two main parts.
One is a config plugin (withLifeOfficeWidget.js) that adds a LifeOfficeWidgetExtension target to the generated Xcode project at expo prebuild time.
It uses Expo’s config-plugins APIs — withXcodeProject, withDangerousMod, withEntitlementsPlist — to script the extension’s Info.plist, entitlements, build phases, and App Group sharing by hand.
The other is a small native module (LifeOfficeWidgetModule.swift) that lets JS talk to WidgetKit.
It exposes exactly one AsyncFunction, reloadWidgets() — without it, the widget wouldn’t refresh after a punch.
The data flow looks like this:
- Whenever a punch or a setting changes, the app builds a JSON snapshot of today’s status and the month’s summary (
widgetExport.ts). - That JSON gets written into the shared App Group container (
group.com.testkun08080.lifeoffice). - The app calls the custom module’s
reloadWidgets()to tell WidgetKit to reload. - The widget extension’s Swift code reads that JSON from the shared container and renders it.
I still had Claude Code do most of the implementation here, but this went a level deeper than typical screen work — rewriting how the generated Xcode project itself gets modified, not just Expo’s usual surface.
CI/CD with Xcode Cloud
For building and distributing to TestFlight, I used Xcode Cloud.
It comes with a free tier included in the Apple Developer Program, which is a nice option for solo projects.
An Expo project isn’t build-ready out of the box, so I had to set up Node and run expo prebuild inside ci_post_clone.sh — pretty much the same setup I wrote about in an earlier post.
Once that was wired up, every push to main just showed up as a new TestFlight build.
App Store screenshots made in Figma
For the screenshots required at submission, I didn’t just use raw device or simulator captures — I put them together in Figma instead.
Lining up the status bar look and adding a short tagline to each screen turned out to be more time-consuming than I expected.
The time I got rejected
I’ve made this sound smooth so far, but I actually got rejected once during review.
It was Guideline 4 / 2.1(b) — overlapping text on the home screen when viewed on iPad.
I’d only been checking on iPhone, so I completely missed how broken the layout looked on iPad.
With supportsTablet: true set, that was the moment it really hit me that testing on an actual iPad is not optional.
I fixed the issue and resubmitted with the corrected build, and it passed without further trouble.
Getting rejected once stung a little, but since the cause was clear, the fix itself didn’t take long.
About six weeks from idea to release
Looking back, it took roughly six weeks from the initial idea to the App Store listing going live.
Honestly, getting there that fast on my first Expo/iOS app was only possible because I leaned on AI at every step.
Planning, mockups, implementation, review fixes — I handed off as much as I could to AI at each stage and focused my own energy on setting direction and making the final calls.
That division of labor turned out to suit me really well right now.
How to use it
The free tier already covers the basic clock-in and record-keeping flow.
- Swipe to punch / shake to punch (toggle in Settings)
- Manual entry for a punch you forgot
- Pre-work memo and post-work comment
- Save or share the punch receipt as a photo
- Records list, calendar, and monthly stats
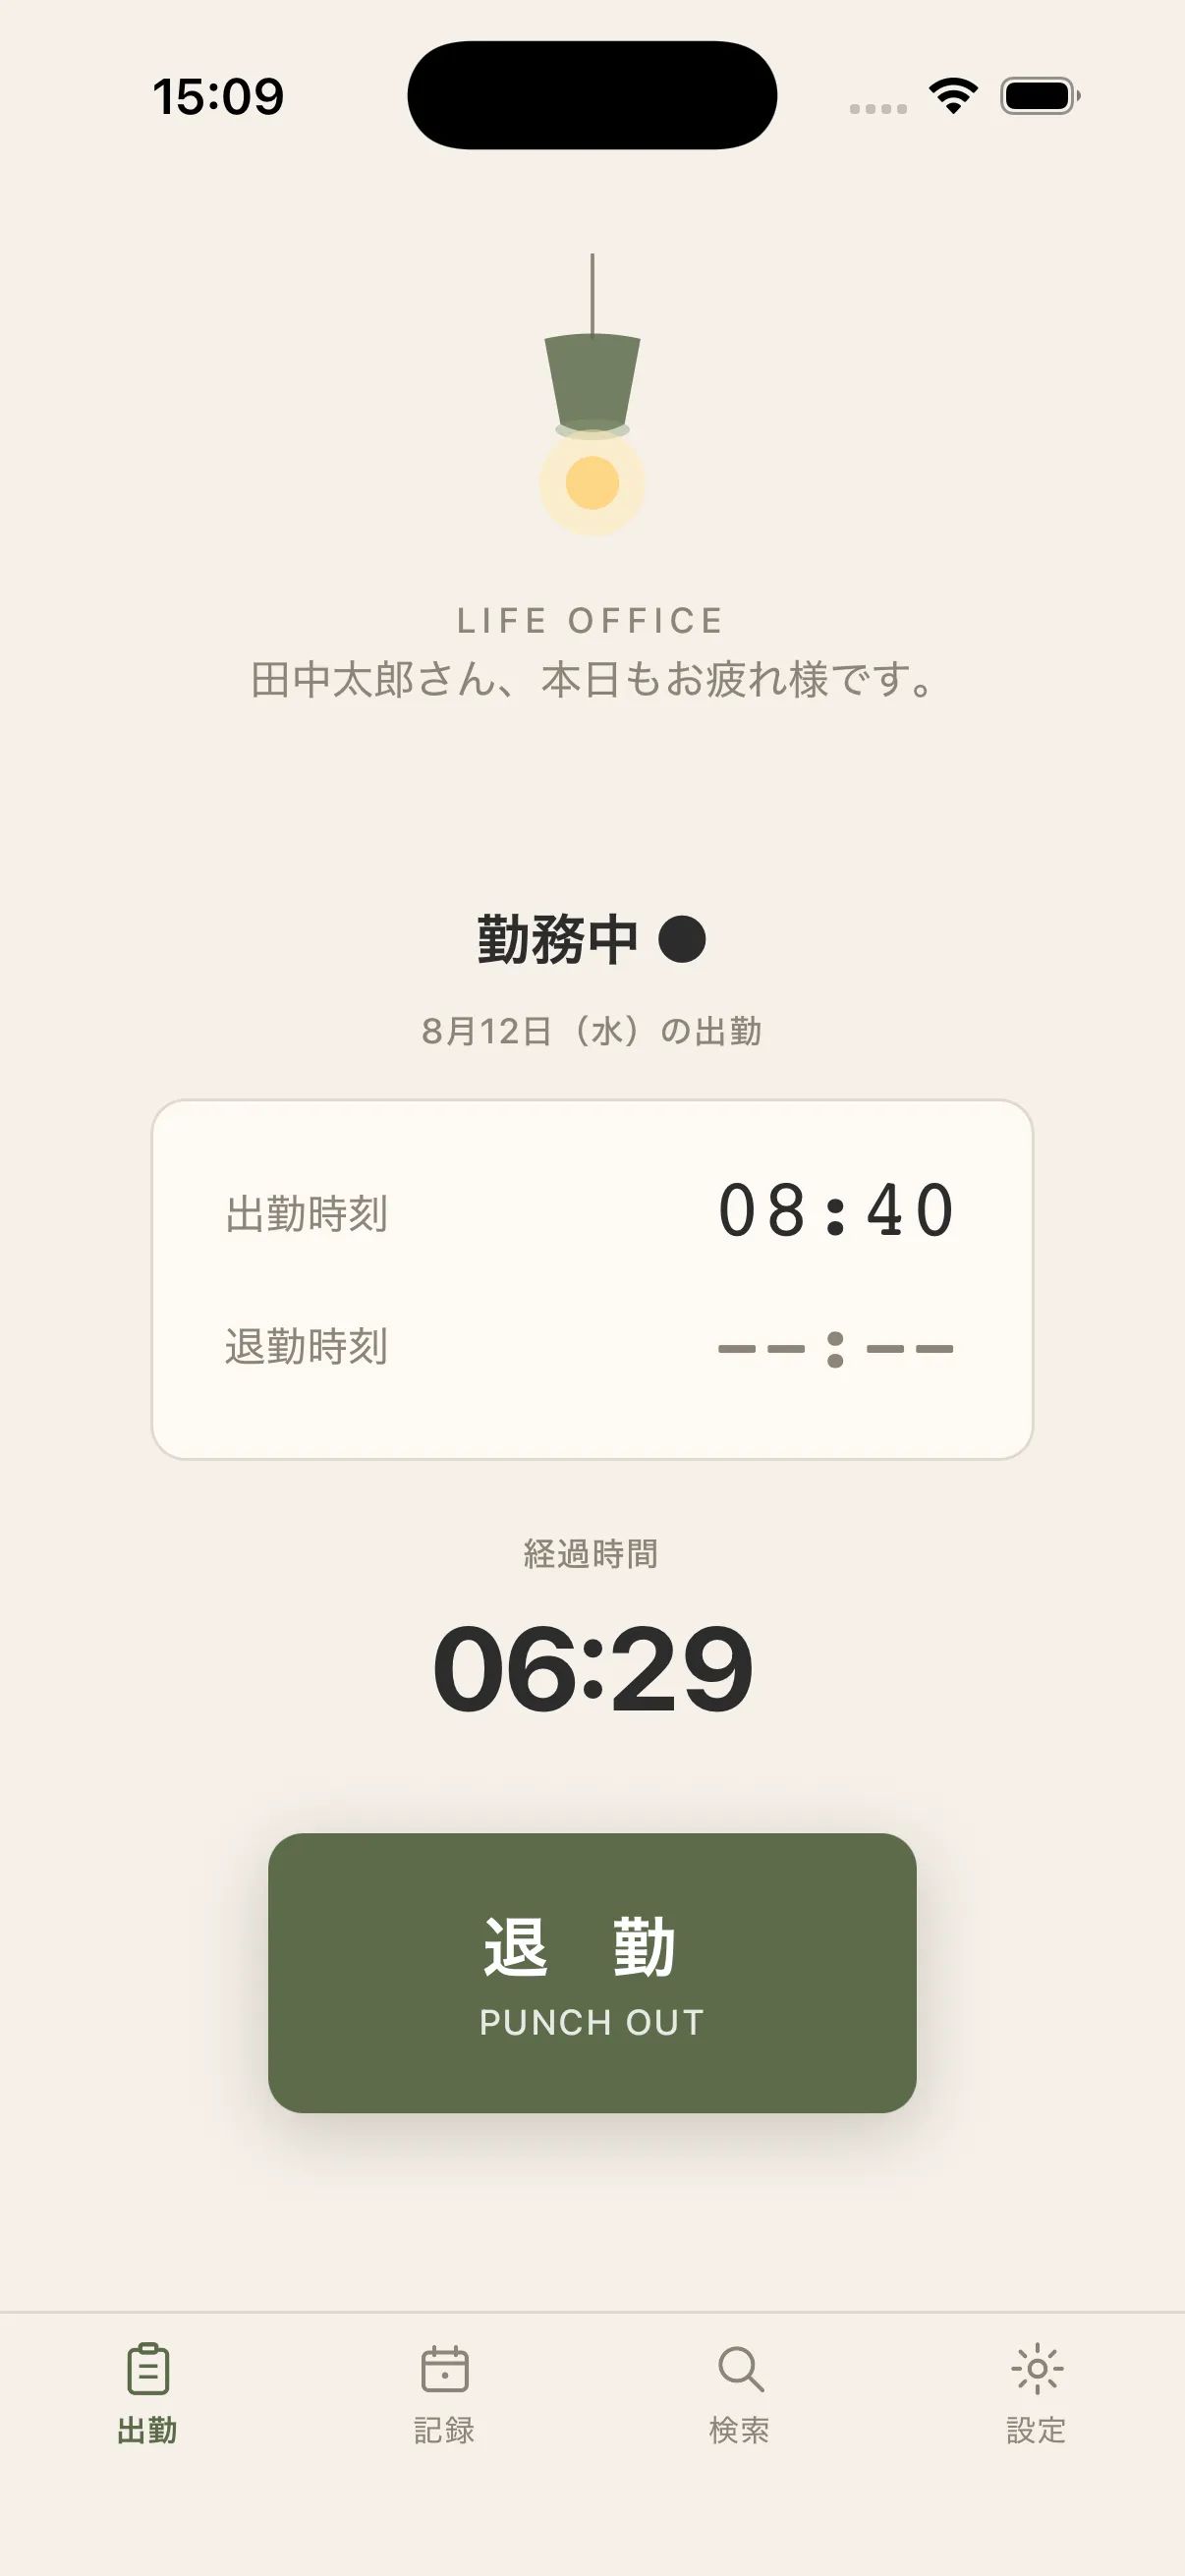
Here’s what the home screen looks like while you’re clocked in.
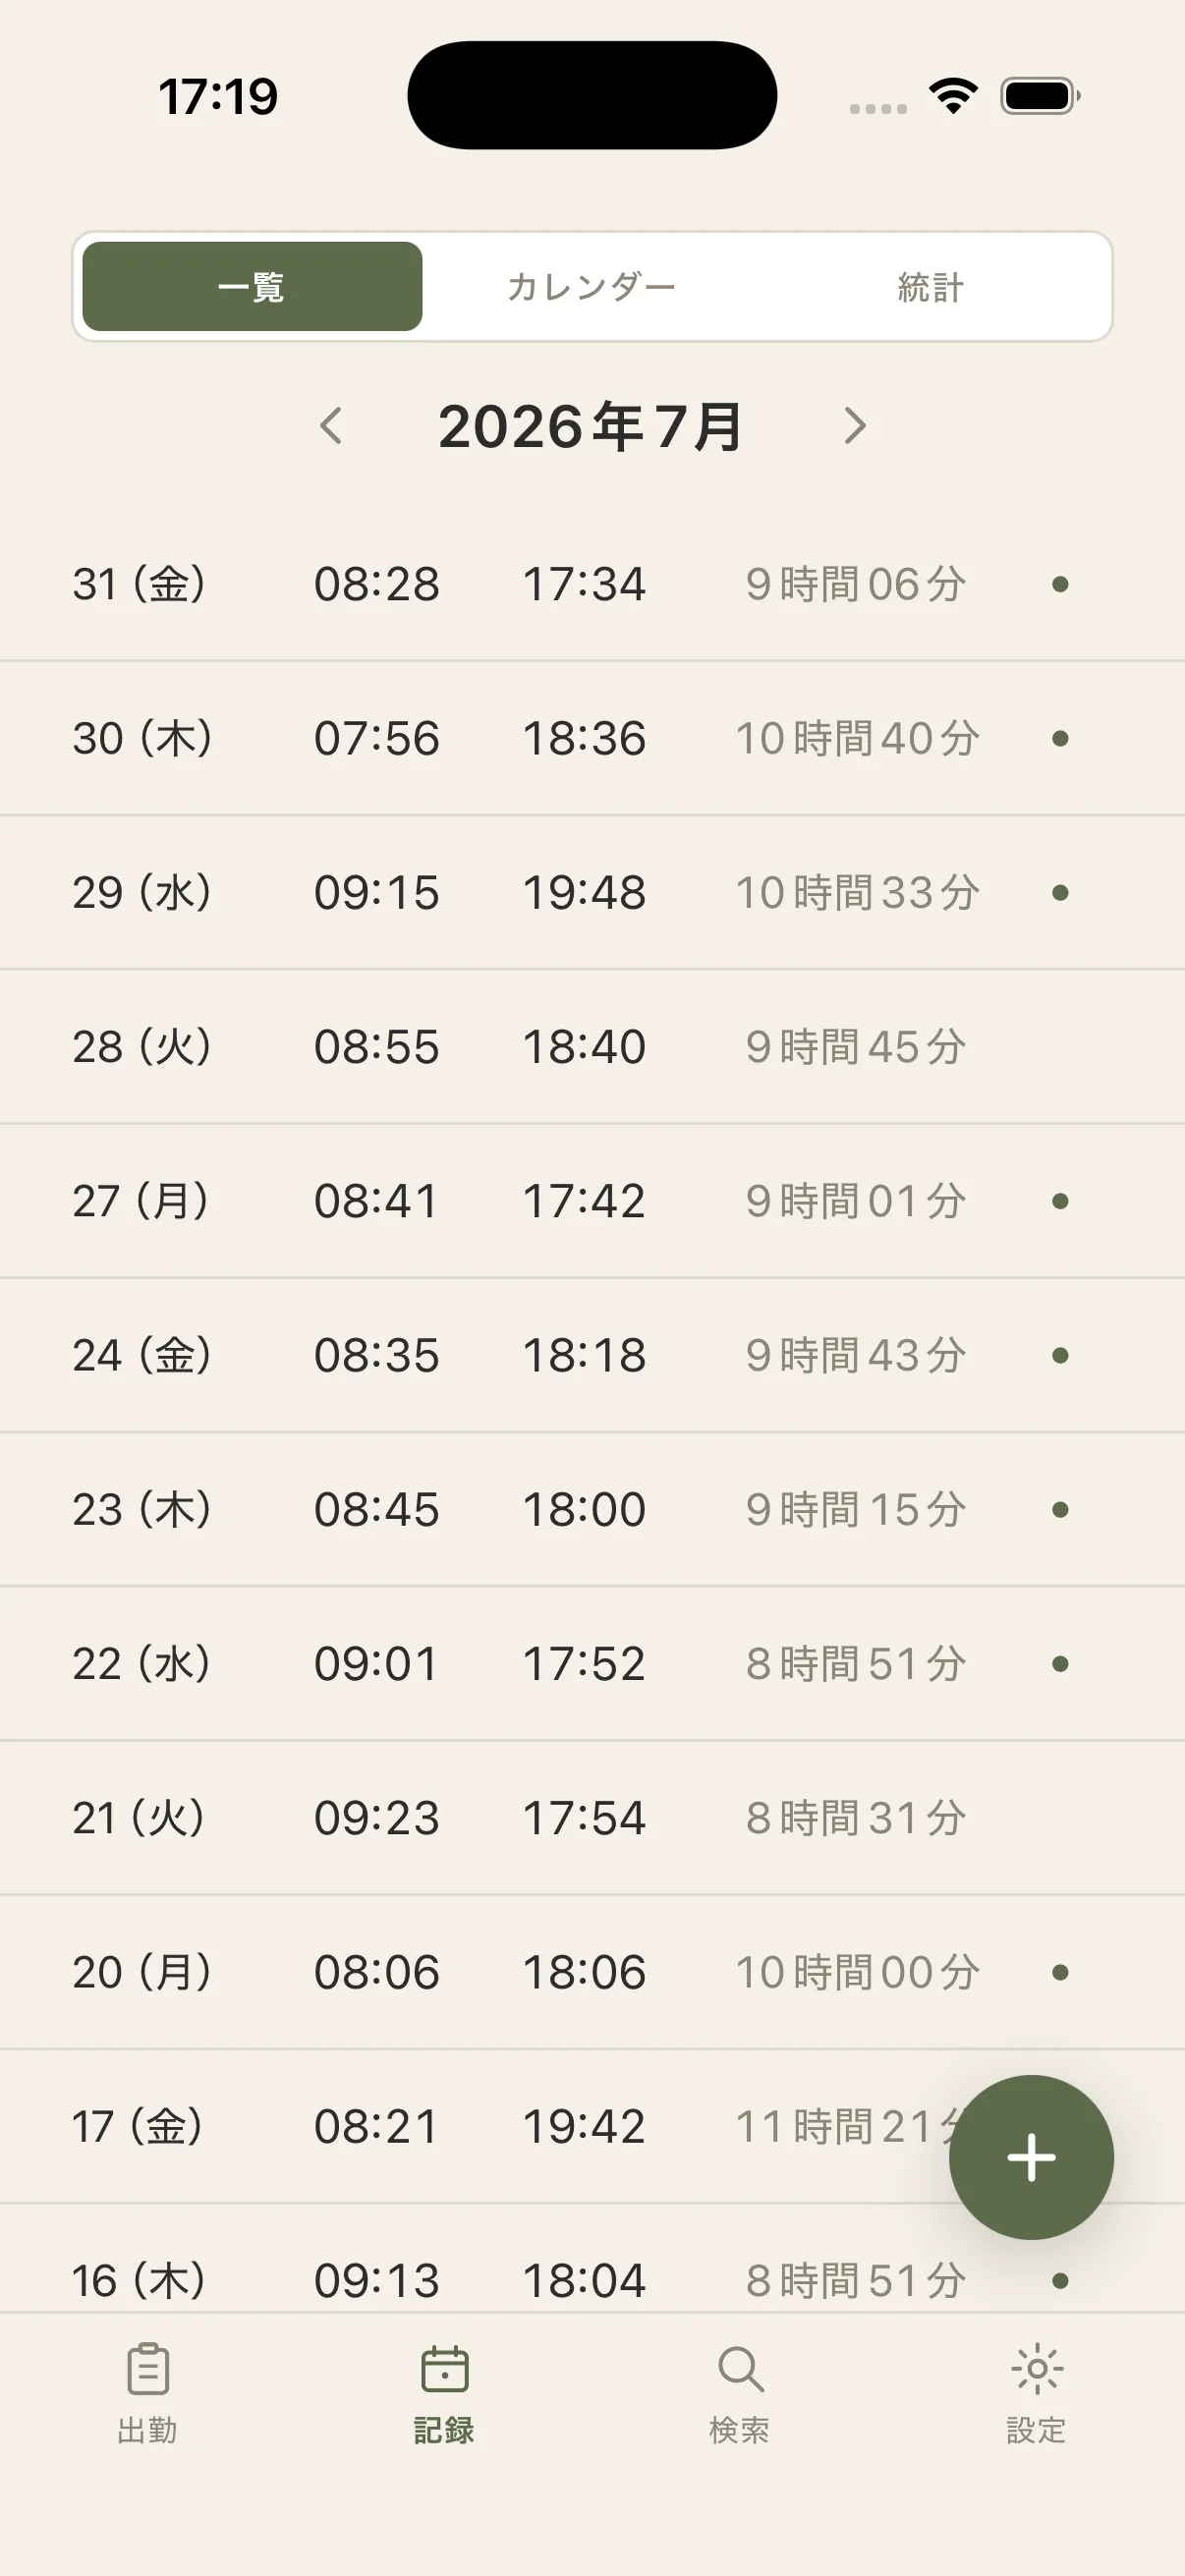
You can look back at your history either as a list or on a calendar.
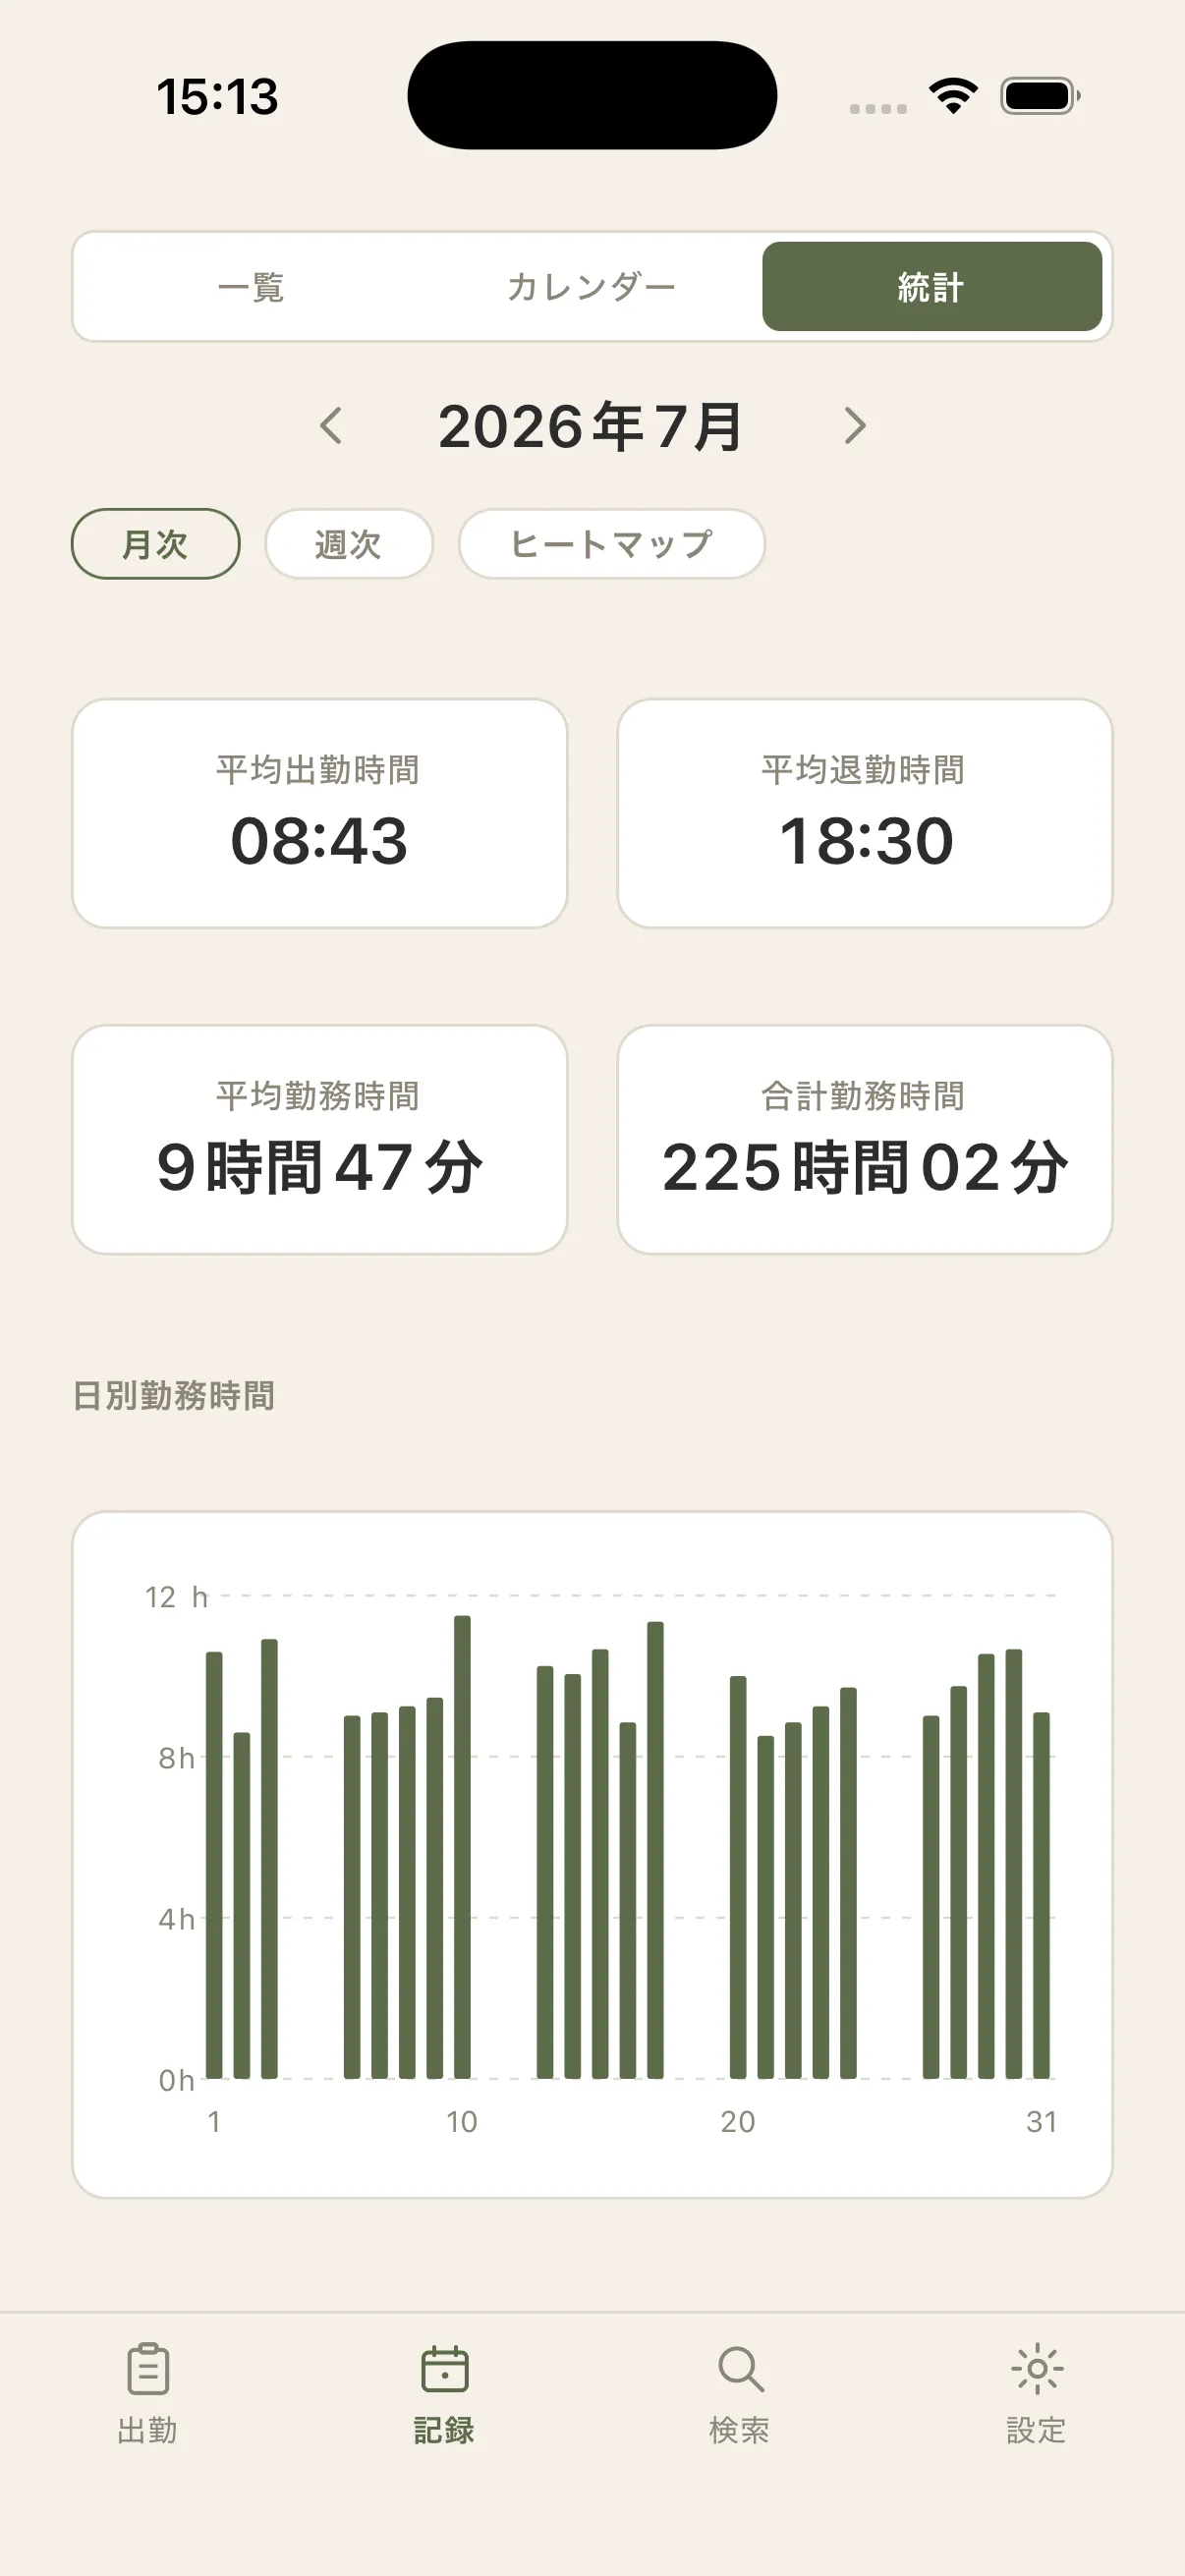
The monthly stats view shows average clock-in time, average clock-out time, average hours worked, total hours worked, and a daily hours chart.
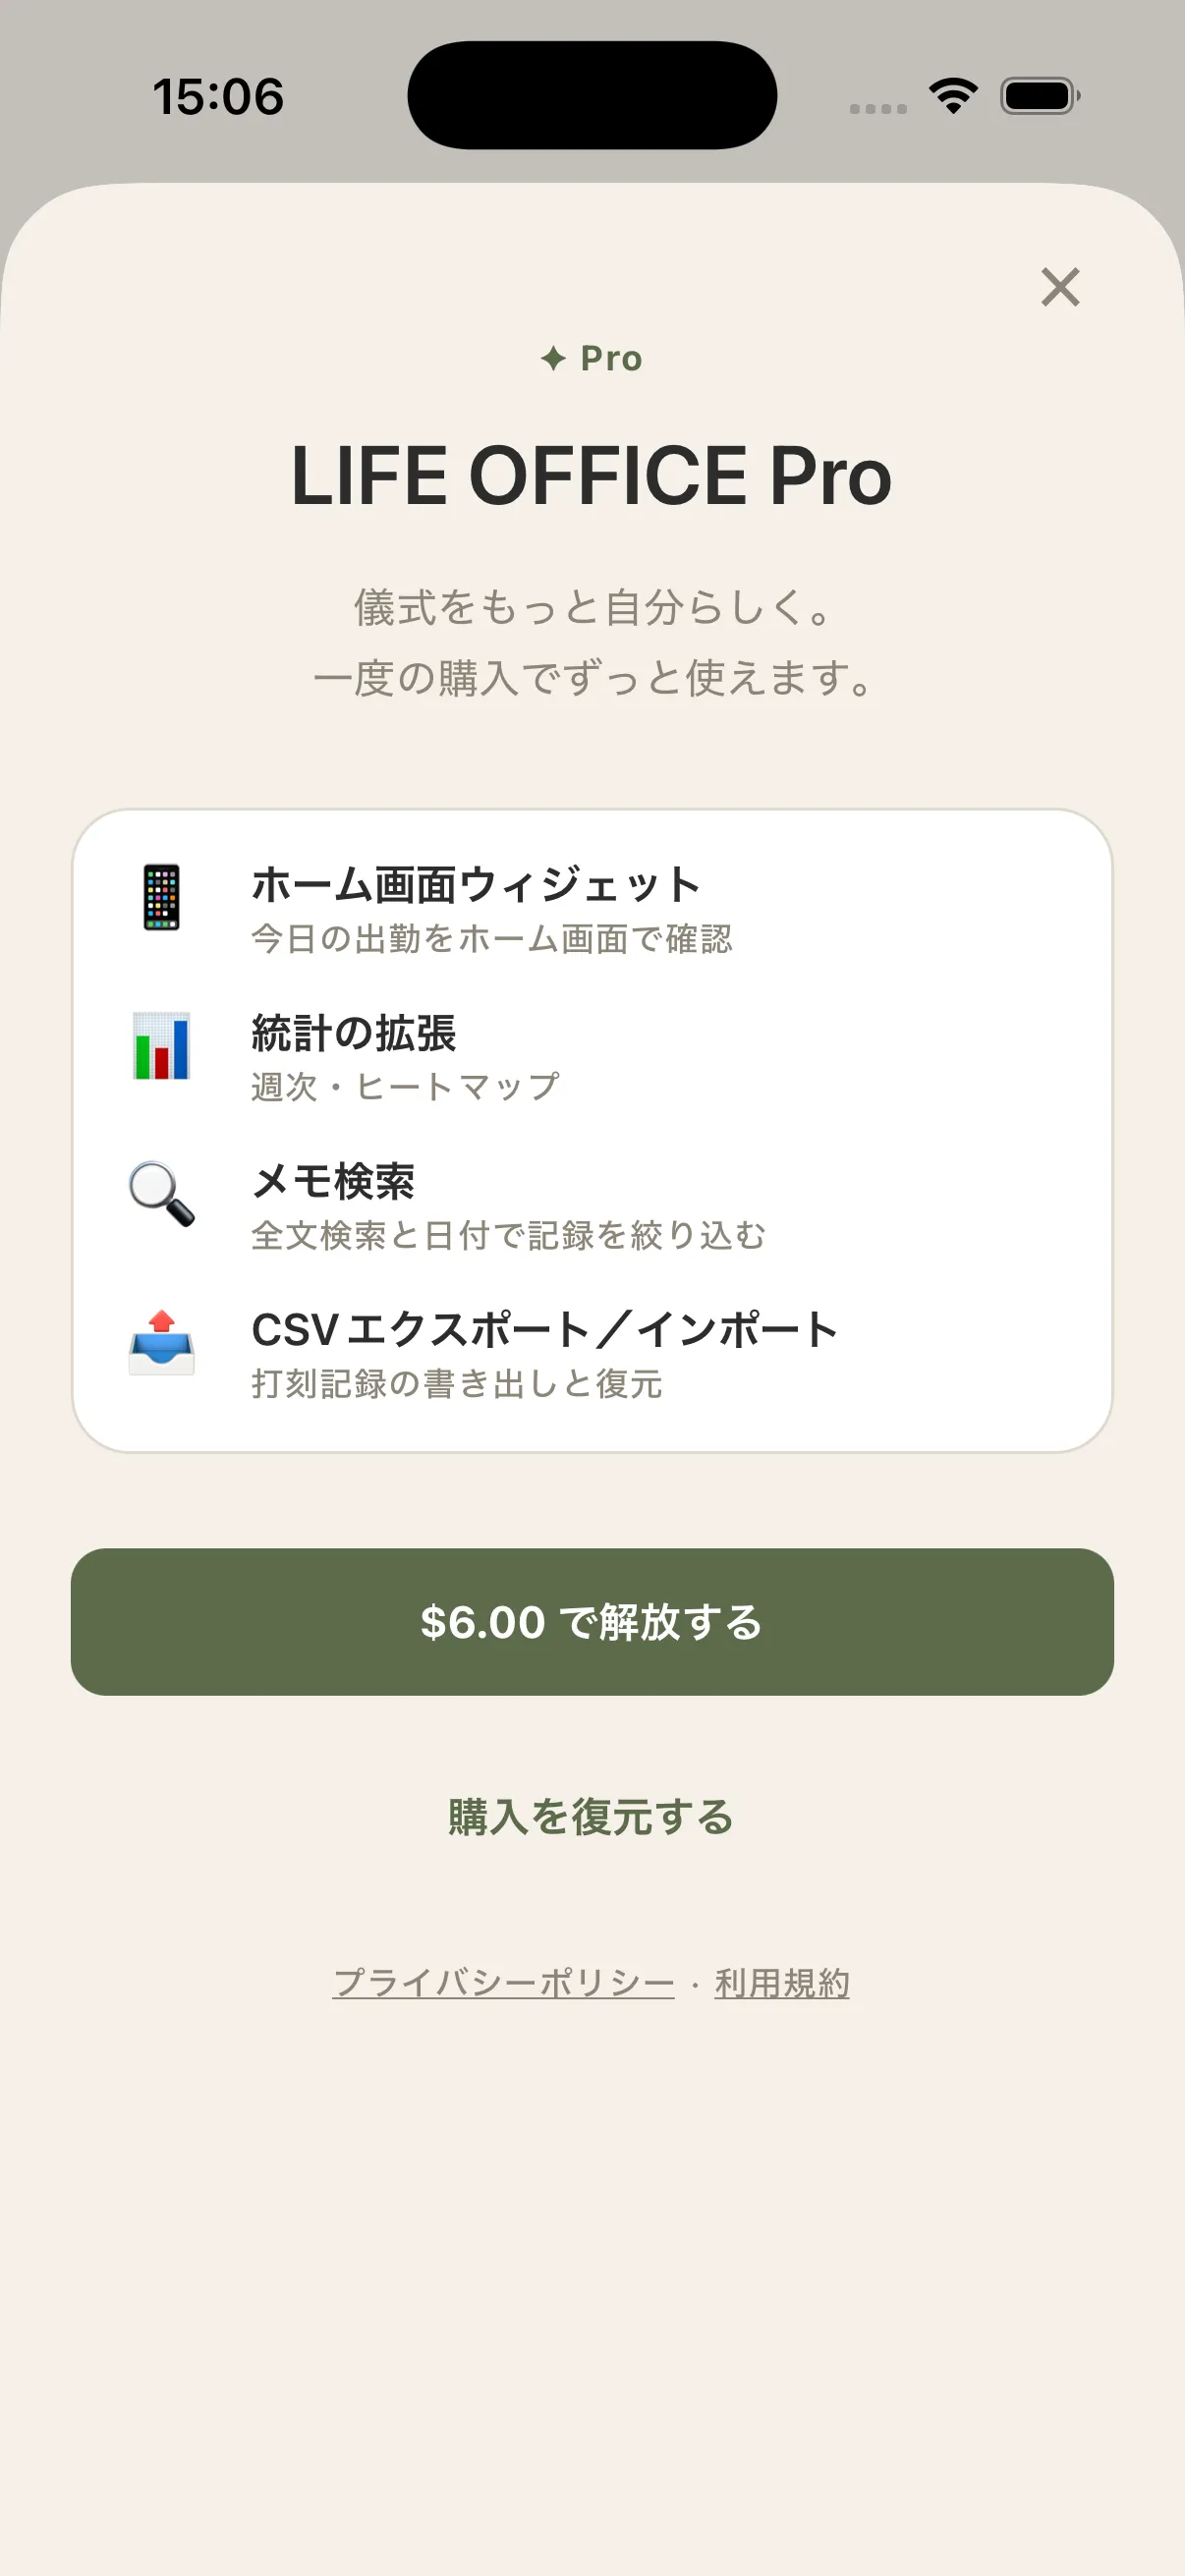
Upgrading to LIFE OFFICE Pro, a one-time $6 purchase, unlocks the following.
- Removes ads
- Home Screen widget
- Light/dark theme switching
- Weekly stats and a heatmap view
- Full-text memo search
- CSV/PDF export and CSV import
- Customizable receipt barcode content
With the widget on your Home Screen, you can see today’s status at a glance.
Everything stays on your device — no account required, and it works fully offline.
Links
For more on the tools used along the way, see these related posts too.
- Expo on Xcode Cloud — ci_post_clone.sh and TestFlight
- Trying the Cursor iOS app
- Trying Grok Bot on iOS: Role-Based Bots and Group Chat
- I’m building Draft, an iOS app where you just talk while looking at photos — so I actually start writing
- My AI-assisted coding life